
Cloudflare and WordPress: The Definitive Performance Setup

I remember the first time I tried Cloudflare. After the activation, my first thought was, that’s it? It felt like magic! Though I didn’t understand at the time how Cloudflare works, I knew it was a game changer for my sites’ performance.
In today’s guide, you’re going to learn what I consider the best Cloudflare setup to speed up WordPress.
Table of Contents
- Chapter 1: Cloudflare as a performance dashboard
- Chapter 2: How to activate Cloudflare
- Chapter 3: Setting up the Cloudflare WordPress plugin
- Chapter 4: DNS tab
- Chapter 5: Crypto tab
- Chapter 6: Speed tab
- Chapter 7: Caching tab
- Chapter 8: The Page Rules tab to Customize Cloudflare by URL
- Chapter 9: The Network and Traffic tabs
- Chapter 10: Cloudflare pricing
- Chapter 11: Bonus tips
Chapter 1: Cloudflare as a performance dashboard
Many of you must be interested in Cloudflare for the CDN feature.
But Cloudflare is much more than a regular CDN.
In fact, Cloudflare is also a DNS provider, a web performance and security panel, a web firewall and much more.
CDNs are usually not recommended for sites with mainly local visitors. However, as I’m going to show you, Cloudflare is very different from a regular CDN provider.
Let’s just mention for now that Cloudflare offers more than 150 POP servers around the world.
It’s three times more than MaxCDN and five times more than KeyCDN.
Therefore, it’s very likely that there is a Cloudflare server near your local market.
Which drops the main argument against using a CDN.
Cloudflare as a web performance panel
Here’s the deal:
For me, Cloudflare isn’t just a CDN, it’s a complete performance panel for my sites. I activate it by default, whether or not a CDN is absolutely required.
- Cloudflare is one of the fastest DNS providers. Plus, the DNS feature is available for free. It’s worth it just for that.
- Do you know any free CDNs? I mean, ones that don’t suck? Yes, Jetpack Photon suck, because it’s so slow.
- It can fix performance gaps from your hosting provider. For example, it can activate HTTP/2, optimize your images, minify your files and activate compression.
That’s why I always activate it.
Let’s suppose you had just renewed your hosting for a full year. Then, you heard about the HTTP/2 protocol and its potential speed benefits, but your hosting doesn’t support it.
Well, lucky for you, with Cloudflare you can still get HTTP/2 without moving your site somewhere else.
Chapter 2: How to activate Cloudflare
In this short chapter, you are going to learn how to enable Cloudflare.
And, learn how to know it’s working. There are two ways to enable Cloudflare (if you have already activated it, feel free to jump to Chapter 3).
Option 1 – DNS change
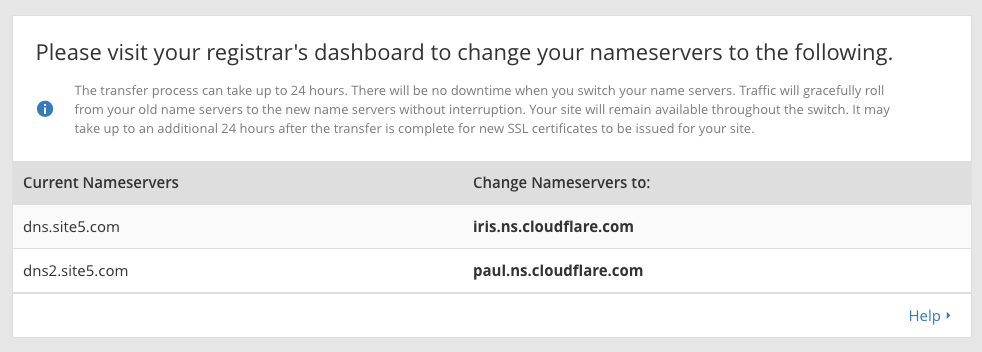
The way it works, you need to change your nameservers for Cloudflare’s nameservers. But don’t worry, it’s a very simple process.
- If you don’t already have a Cloudflare account, create one now.
- Add your URL and wait. Cloudflare should automatically replicate all your DNS’ records, but if some are missing, just add them.
- Finally, Cloudflare will show your new name servers. So, log in to your domain name registrar and replace the old name servers for the new ones.
Pretty simple right?
Option 2 – Through Cloudflare hosting partners
It’s also possible to activate it from Cloudflare’s hosting partners. Check out Cloudflare’s optimized hosting partners list to know if your hosting provider is in it.
I personally noticed a 50 ms difference in the Time to First Byte between the two ways of enabling Cloudflare. Therefore, I strongly recommend you change your name server.
Verify Cloudflare activation
Nameserver (DNS) changes can take up to 48 hours. However, most of the time, it won’t take more than a couple of hours. Probably even just two hours, but don’t worry if it takes longer. It’s normal.
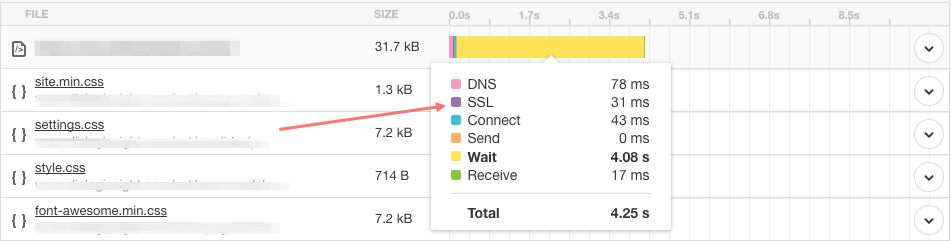
So, to verify it’s working, open your browser’s developer tool or a website speed test.
With your browser’s developer tool
- Open your site in the browser and press CTRL + ALT + i for Mac, or F12 for Windows.
- Then, navigate to the network tab and refresh the page.
- Click on the first request and search for the server row.
With a website speed test
- Execute the speed test and locate the File Requests section.
- Then, open the first request and search for the server row.
Further reading:
- Cloudflare Support: Create a Cloudflare account and add a website
- Cloudflare Support: Change your domain name servers to Cloudflare
Chapter 3: Setting up the Cloudflare WordPress plugin
The official Cloudflare WordPress plugin is not mandatory, but I encourage you to install it.
The plugin is going to help you purge the cache, change some options and almost forget that Cloudflare is activated.
First, download, install and activate the plugin.
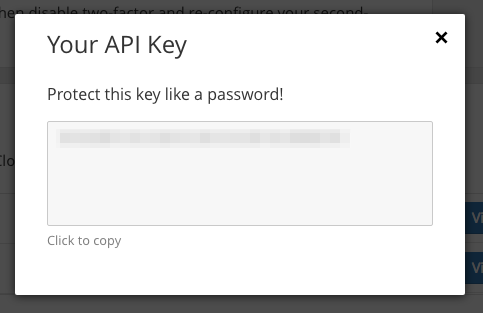
Second, from your Cloudflare dashboard, go to the “My Profile” page and copy your “Global API Key.”
Finally, from your WordPress admin, go to “Settings -> Cloudflare” and enter your API key and your email address.
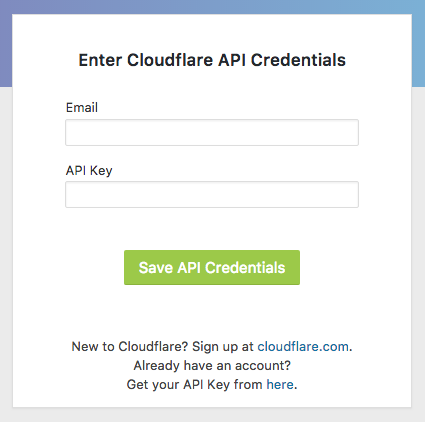
You should then see the plugin setting.
Recommended settings
I’m not going to describe each setting here. For now, just apply the Cloudflare recommended settings.
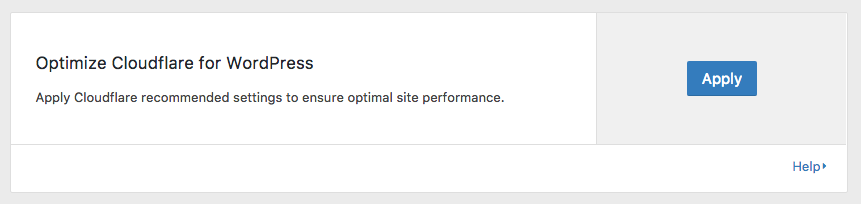
And turn on the automatic cache management.
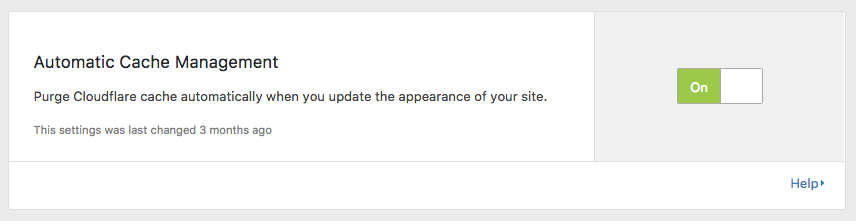
This option is particularly useful if you are caching your WordPress pages with Cloudflare.
Further reading:
- Cloudflare Support: Using Cloudflare with WordPress
- Cloudflare’s Plugin for WordPress
Chapter 4: DNS tab
A misconfiguration here could keep your site from gaining any speed improvement.
If you want to jump directly to the next chapter, you just need to know that orange clouds mean Cloudflare is on, and grey clouds mean Cloudflare is off.
DNS records
This section is not complicated.
Orange clouds mean Cloudflare is enabled, and grey clouds mean, well, not so much activated.
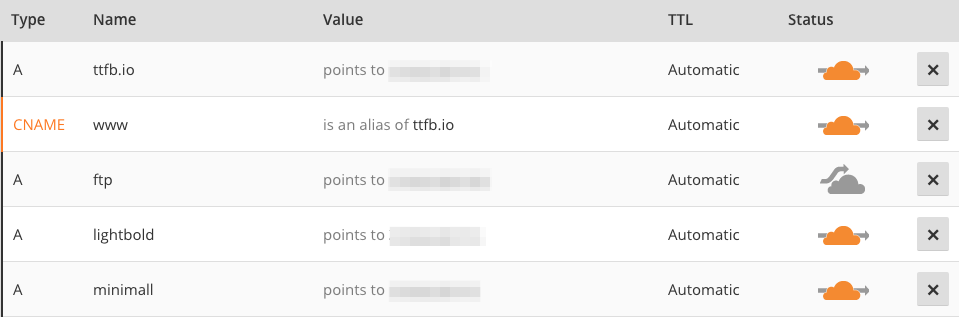
Notice the FTP record? Its cloud is grey, to get direct access to the server. You should do the same for all records that are not your root domain or a subdomain.
This is how you can turn off Cloudflare for debugging or just to test your site’s speed without it.
Just remember that it can take some time (5–15 minutes) to take effect.
Flattern those CNAMEs
Well, this point is pretty geeky. The majority of you don’t have to change anything here.
But I want to address it because it’s another transparent feature that speeds up your site.
If you are like me and hate having a “www” subdomain, flattening your subdomain might be for you.
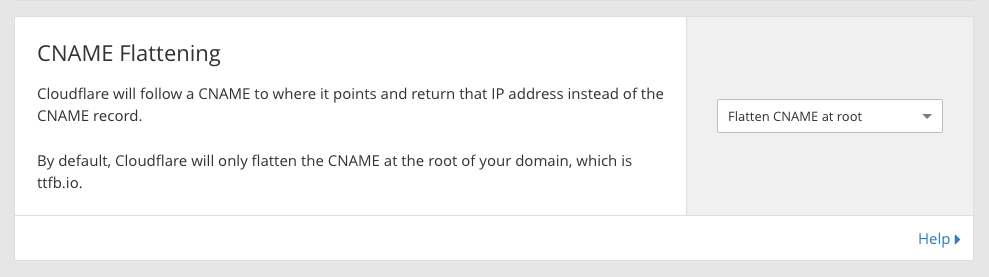
Thanks to Cloudflare for activating this on all its plans.
Here’s what the Cloudflare team has to say about CNAME flattening:
An ancillary benefit we’ve found is that we decrease the time for CNAME resolution by about 30% on average.
Further reading:
- CloudFlare Support: Cloudflare: Introducing CNAME flattening
- CloudFlare Learning Center: What is a DNS record?
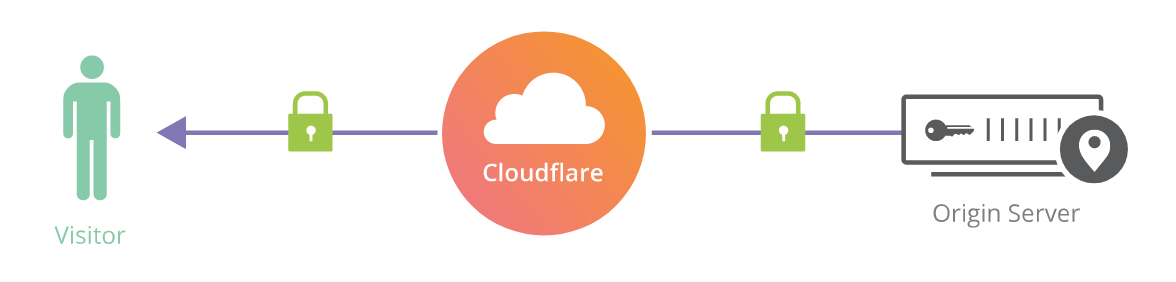
Chapter 5: Crypto tab
You may wondering why Crypto tab is here: it’s a security section, isn’t it?
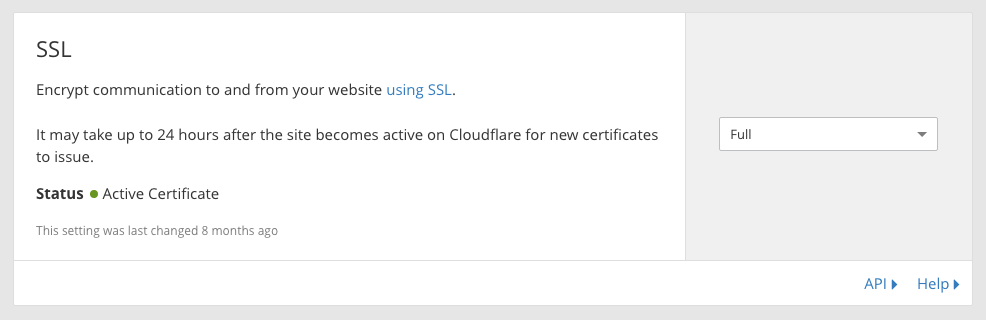
Yes it is, but some settings in the Crypto section have to be set correctly to ensure you get the best results.
Enable SSL and HTTP/2
Enabling SSL in Cloudflare also activates the HTTP/2 protocol. It allows many performance benefits, including multiplexing and header compression.
If you have been toying with the idea of migrating to HTTPS, I strongly recommend you do so now.
There is no reason not to enable SSL
Especially since the arrival of HTTP/2, and the fact that HTTPS is a ranking signal for search engines.
Start by enabling an SSL certificate on your server. If you don’t know how, ask your hosting provider.
Then, set the Cloudflare setting to “Full” or “Full Strict.” The Flexible SSL should be used as a last resort only.
Flexible SSL

I don’t recommend the flexible SSL. It’s less secure than the two other options and it can cause a redirect loop. If you do encounter a redirect loop, this help file can help, as well as this WordPress plugin.
I don’t recommend this SSL option but it’s better than nothing if, for some reason, you can’t create an SSL certificate at your origin server.
Full SSL
To use full SSL, a certificate must be enabled on your origin server, but the certificate doesn’t have to be valid.
This means a self-signed certificate will work.
Full SSL (strict)
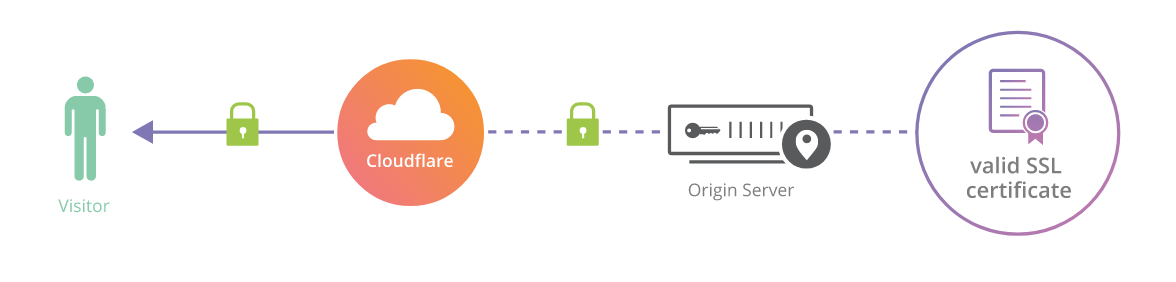
A valid SSL certificate is mandatory for the full SSL option.
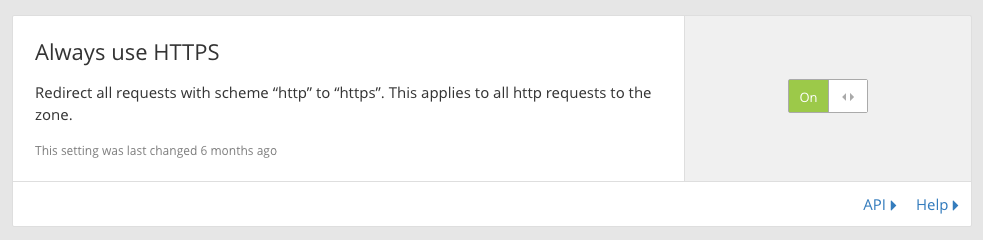
Always use HTTPS
After enabling SSL, you have to make sure users are redirected to the HTTPS version of your site.
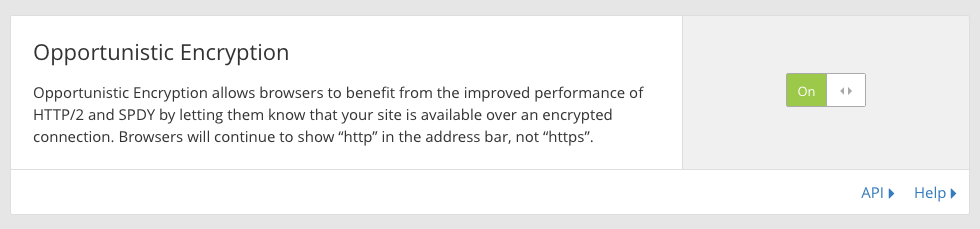
Opportunistic encryption
This will probably not be useful if you have correctly set up an SSL certificate—but it costs nothing to activate it.
TLS 1.3
A secured site was slower than a non-secured site during the HTTP/1 era.
Fortunately, this isn’t true anymore, thanks to the new HTTP/2 protocol.
However, to connect to an encrypted site, you must first establish what’s called an SSL handshake, and this takes time.
The TLS1.3 is the latest and fastest version of the TLS protocol.

Automatic HTTPS rewrites
Last but not least, you want to enable Automatic HTTPS Rewrites to prevent resources from loading from unsecured connections.

Further reading:
- Cloudflare one-click SSL
- Cloudflare Blog: Introducing TLS1.3
- Google Web Fundamentals: Introduction to HTTP/2
Chapter 6: Speed tab
Now we’re at the heart of the subject.
I’m going to explain each setting in this tab and give you my thoughts on them.
You shouldn’t turn on all the switches here.
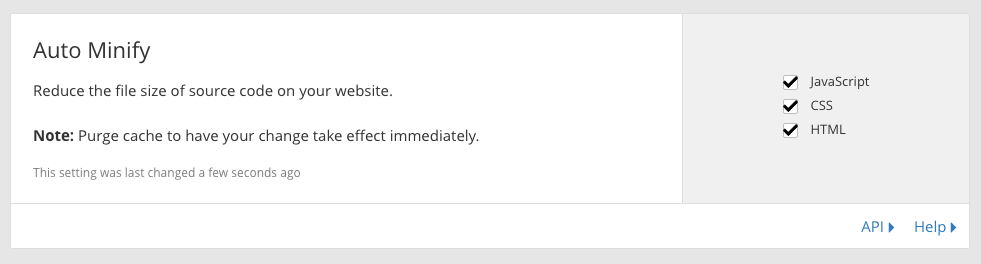
Auto minify
Minification removes unnecessary characters from your source code without changing its functionality. This process reduces file size, which improves page load times.
Cloudflare’s auto minify option is a light minification process, and the risk of breaking anything is low.
Don’t hesitate to enable it, even if you already use a plugin for minification.
Polish [Pro]
This feature is pretty impressive.
Once enabled, Polish automatically optimizes your images on the fly.
Cloudflare can also serve a WebP image if a compatible user agent is detected. WebP image is a modern image format that provides superior compression possibilities.
Have you already tried using WebP images on a WordPress site?
If so, you know it’s a far-from-seamless process.
But with Cloudflare, you can just enable it and forget about it!
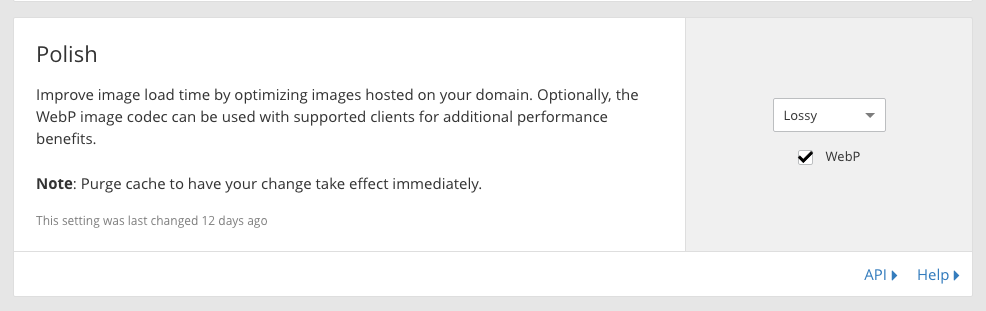
Polish allows two types of compression.
Lossless: Reduce the size of image files without impacting visual quality.
Lossy: Going further than Lossless, here, JPEG images are even more compressed, which may reduce visual quality.
Unless you are a super-picky photographer, you should choose Lossy compression.
Railgun [Business]
I must admit, Railgun really looks awesome!
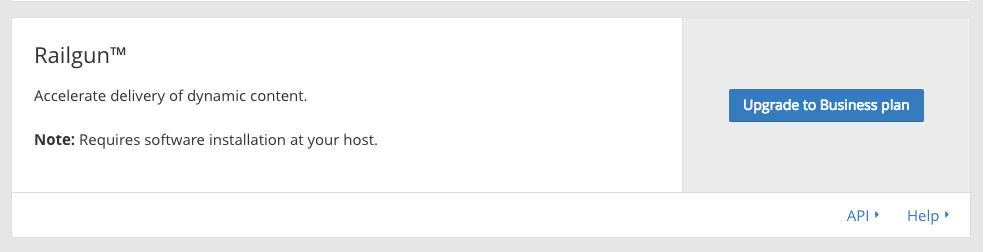
However, in practice, I have never observed much difference in site speed with it activated.
What Railgun does is it compresses exchanges between Cloudflare and the origin server even more.
Without Railgun

With Railgun

In addition to being available only for Business and higher plans, Railgun requires a compatible server.
Check out the Cloudflare’s hosting partners page to find one.
Railgun on a free plan
You can get access to Railgun on a free plan if you activate Cloudflare from your hosting provider. Though, like I said earlier, you are better off changing your DNS manually.
Enable Accelerated Mobile Links (AMP)
The AMP project is quite controversial in the industry.
I have personally never used it, since my sites are faster than an AMP site most of the time.
Nevertheless, if your site is AMP-ready, this feature might interest you.
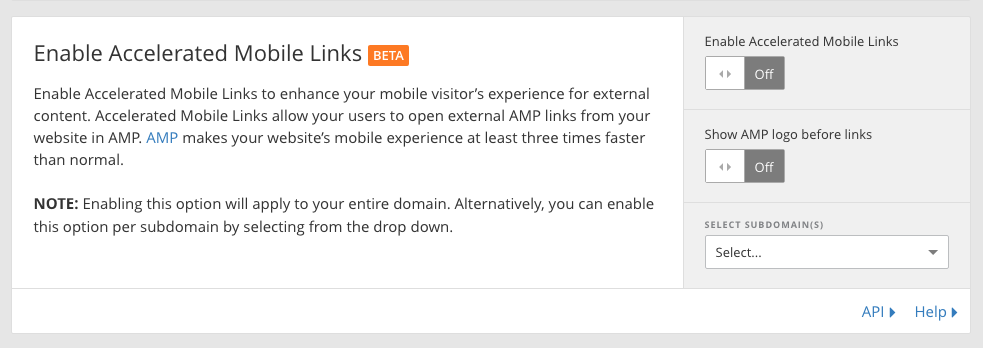
Here’s the scoop:: Users usually only land on an AMP page when they are coming from a Google search result.
But, with this turned on, Cloudflare will dynamically change links on your page to the corresponding AMP page.
Which is pretty cool for AMP websites.
Further reading:
Brotli
Brotli is the most efficient compression algorithm out there.
According to Mozilla, Brotli may outperform Gzip by 22%.

There is no risk in activating it.
Mirage
Mirage is another Cloudflare exclusive.
It works three ways:
Detection: Cloudflare detects the visitor’s device and network connection type, and stores this for the next visit.
Virtualization: Virtualization is a lazy load technique. It displays a super low-resolution image to the user, and the regular image loads in parallel during the consolidation step.
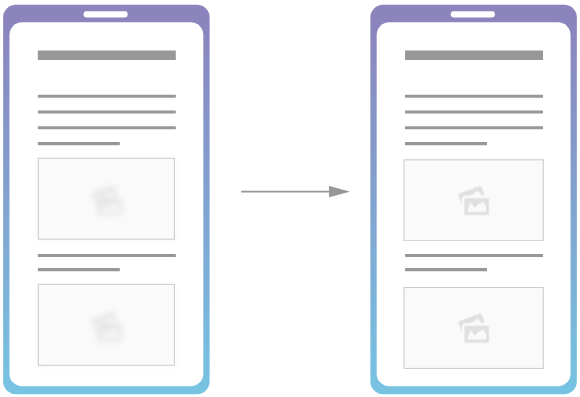
Consolidation: The consolidation step merges all image requests into one request.
As a result of these three ways, even a page with hundreds of images can start to be seen in the browser with as few as two requests.
As cool as Mirage is, it works on mobiles only. I wonder why, because lazyloading images is a strong performance booster that desktop visitors could also benefit from. I guess they determined that the speed improvement was marginal on desktops.
Further reading:
Rocket Loader
The way Rocket Loader works is similar to Mirage’s consolidation step.
Rocket Loader transparently defers all Javascript execution until the rest of the page has loaded. This allows the browser to display the content the visitors are interested in as soon as possible.
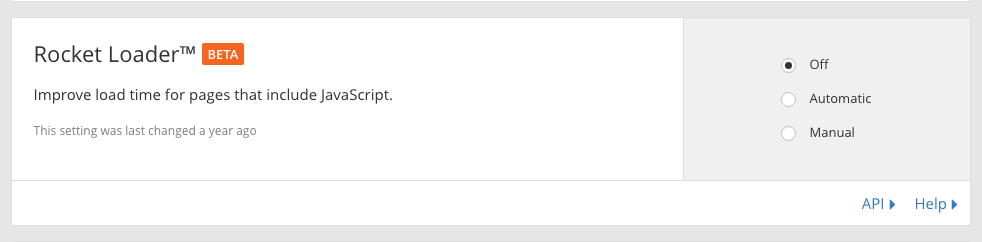
I tested it on dozens of WordPress sites, and my recommendation is you SHOULD NOT ACTIVATE IT.
Why?
Based on experiments, sites with Rocket Loader enabled were either dysfunctional or slower than sites with WordPress optimization plugins installed.
There’s nothing keeping you from testing it on your site though.
But, in my book, it’s a waste of time.
Mobile redirect
What this section does is obvious.
In case you handle mobile traffic the old way.
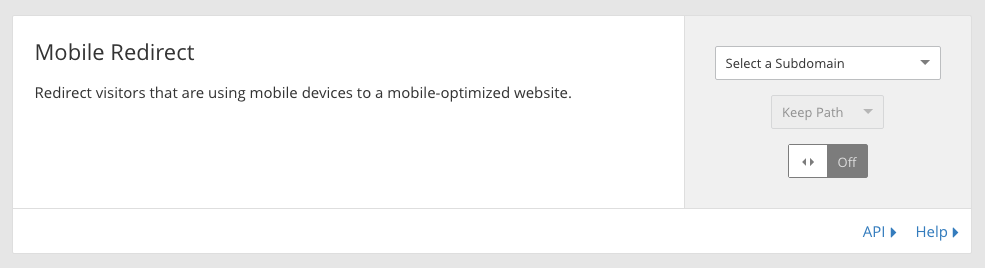
A mobile redirect on Cloudflare is going to be faster than a Javascript solution.
Prefetching URLs from HTTP headers
I have never had the opportunity to work on an Entreprise plan.
But when I do, I would activate this option.
Once enabled, Cloudflare is going to prefetch URLs you have specified in your manifest file.
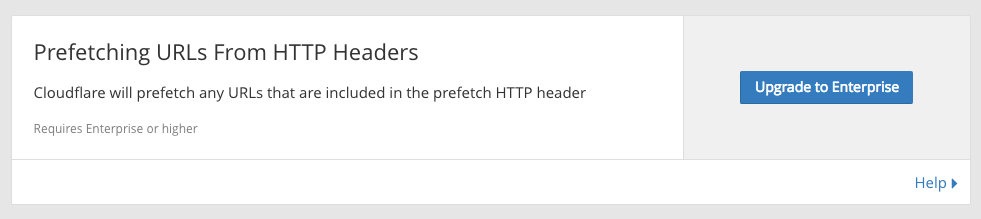
This won’t accelerate the first view, but it will most likely speed up subsequent page views.
Chapter 7: Caching tab
In this chapter, I’m going to cover all the settings related to the Cloudflare cache.
This includes how to purge the Cloudflare cache and how to fix the browser cache length.
Purge cache
This is where you clear a file or your entire site’s cache.

While your first reflex might be to flush the entire cache, Cloudflare recommends purging individual files instead.
This make sense because clearing the entire cache will increase requests to your server, which will raise your bandwidth and CPU usage.
So, when possible, use the Purge Individual Files option.
However, you can purge your files’ cache under the CloudFlare WordPress plugin panel.
Caching level
This should already be set correctly, but if not, set the caching level to standard.
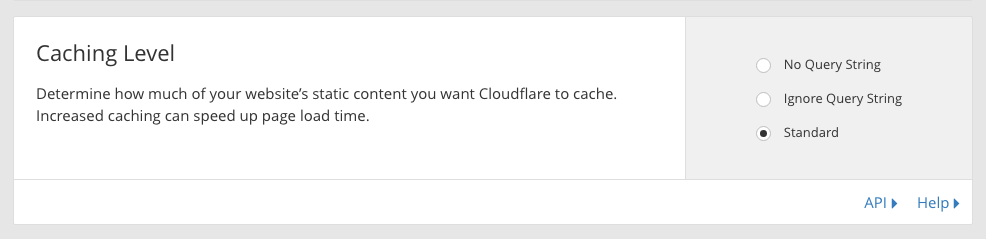
- No Query String: Only delivers files from the cache when there is no query string.
- Ignore Query String: Delivers the same resource to everyone, independently of the query string.
- Standard: Delivers a different resource each time the query string changes. This is the regular behaviour.
Browser cache expiration
This is where you make sure users never load the same resource twice.
The best option here is to set the Browser Cache Expiration option to Respect Existing Headers.
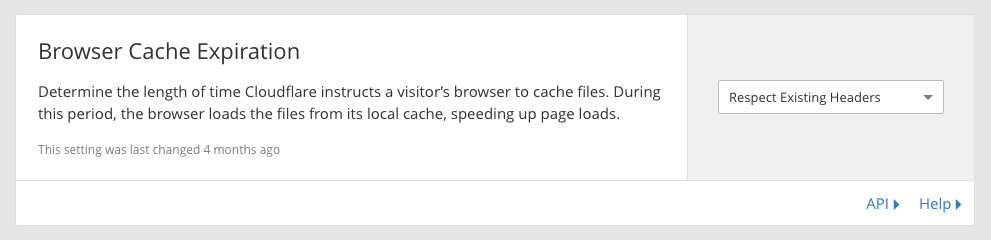
This tells CloudFlare to respect the file headers set by your origin server. It’s useful for keeping better control on WordPress directly through plugins.
However, it’s only good if headers are well configured on your server.
How to check the browser cache headers
The fastest way is to scan your site with Google PageSpeed Insight.
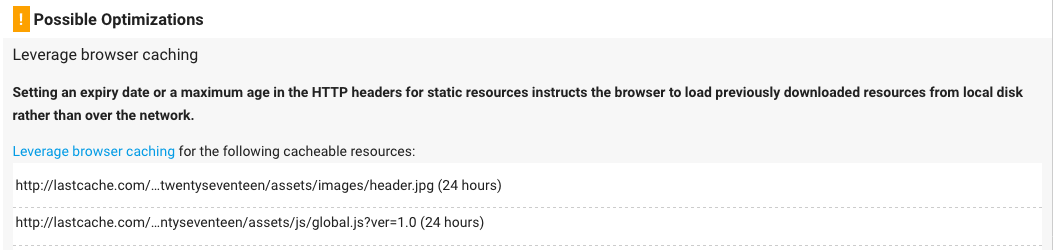
Your origin server has set the wrong headers:
- If PageSpeed Insights displays the “Leverage Browser Caching” error, and
- If the files are coming from your site.
What if the error is displayed but the files are external to your site?
Unfortunately, you can’t control files on another server.
What if you do have a browser cache issue?
I recommend first trying to fix it on your server. For Apache and Litespeed servers, try this WordPress plugin.
If that doesn’t work for you, you can overwrite your server headers from Cloudflare.
Set the Browser expiration setting to 8 days.

Further reading:
- Cloudflare Support: How do I purge my cache?
- Cloudflare Support: What does Browser Cache Expire TTL mean?
- Google We Fundamental: HTTP cache
- Kinsta Article: A more in-depth explanation and how to fix.
Chapter 8: The Page Rules tab to Customize Cloudflare by URL
Page rules are very useful for controlling how Cloudflare works across your domain.
They allow you to change settings on a directory and subdomain basis.
The number of page rules included depends on your plan: 3 in the free plan, 20 in Pro, and 50 in Business.
Since you can do a lot with page rules, I’ll just show you common WordPress usage.
The order of Page Rules matters. Only one page rule applies by request. Therefore, drag and drop the most important rules to the top.
Performance-related page rules
- Browser Cache TTL – Controls how long resources cached by client browsers remain valid.
- Edge Cache TTL – Controls how long Cloudflare retains files in its cache.
- Cache Level – Controls how much of your website’s static content you want Cloudflare to cache. Unlike the Caching Level option under the Caching tab, this page rule has two additional values: Bypass Cache and Cache Everything.
- Rocket Loader – Controls the activation of Rocket Loader.
- Origin Cache Control – Controls whether Cloudflare must respect the origin server cache headers.
- Disable Performance – Disables Minification, Rocket Loader, Mirage and Polish.
- Forwarding URL – Creates redirect rules.
- Polish (Pro) – Controls the activation of Polish.
- Mirage (Pro) – Controls the activation of Mirage.
- Bypass Cache Cookie (Business) – Bypasses the Cache Everything rule and fetches resources from the origin server.
- Cache On Cookie (Enteprise) – Activates the Cache Everything rule and fetches resources from Cloudflare servers.
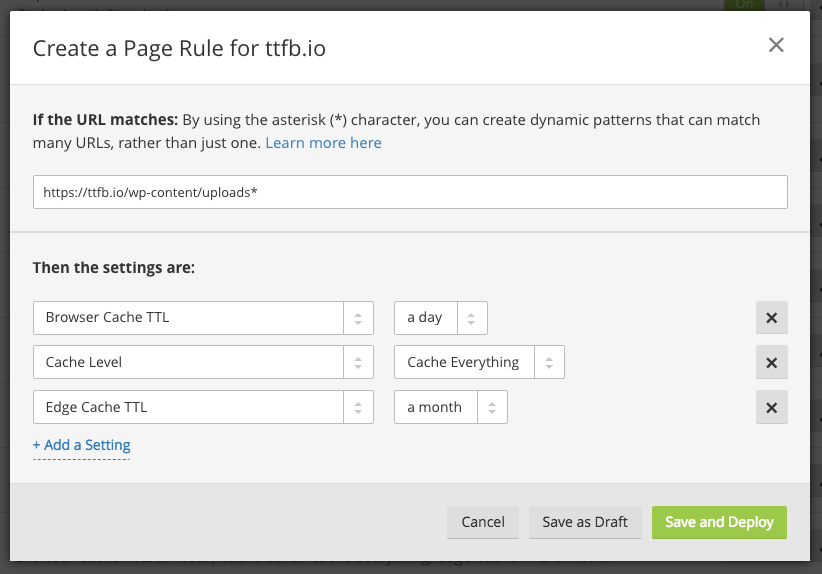
Stronger media cache
Odds are that your site images and files won’t change.
Then, why not apply an aggressive caching rule?
Faster redirects
I have never been a fan of managing redirects from WordPress.
Page rules allow you to easily create 301 and 302 redirects, which couldn’t be faster since the request doesn’t reach your origin server at all.
Simple redirect:
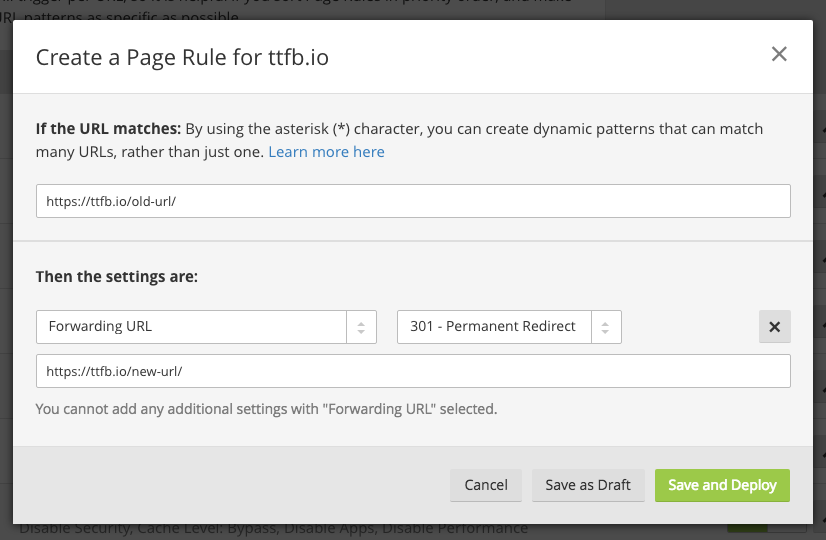
Advanced redirect:

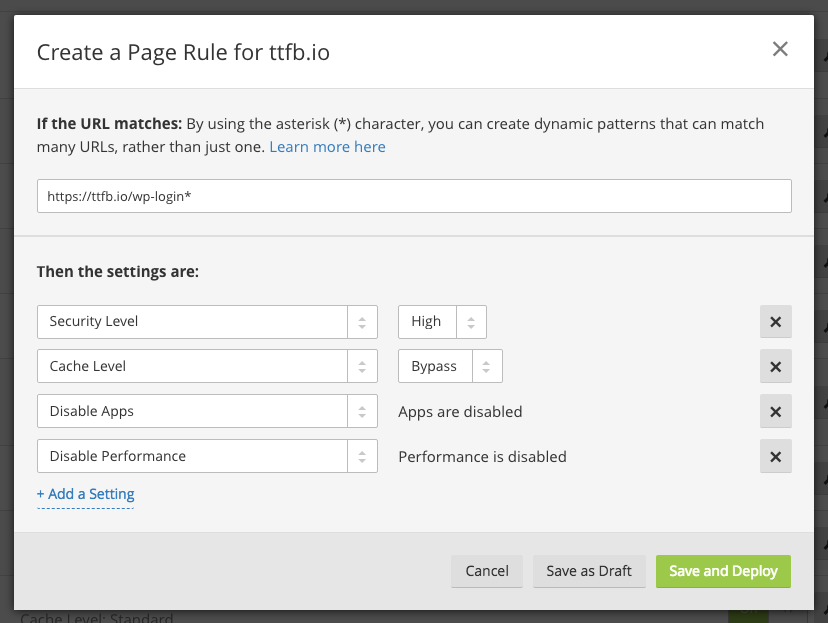
Securing the WordPress admin and login
To enhance security but also ensure that everything works smoothly.

Trick to save on page rules
Like I said above, you don’t have an unlimited number of page rules.
Consequently, you can use wildcards to save some.
For example, take my business needs as a WordPress themes shop: I need to secure WordPress admin on subdomains, on the main directory and even on subdirectories.
Here’s what it looks like using wildcards:

Further reading:
Chapter 9: The Network and Traffic tabs
This chapter covers the Network and Traffic tab options.
Pay special attention to the Argo section, as it’s a very interesting way to leverage your origin server loads.
HTTP/2 + SPDY
This setting should always be activated to HTTP/2 + SPDY—unless you have very specific needs.

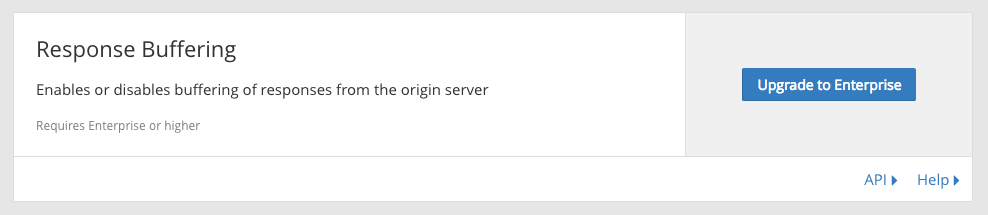
Response buffering
The default behaviour, which is to send packets to the client as soon as received, shouldn’t change.
However, if you have very special needs, you can activate it to tell Cloudflare to wait until it has the entire file before forwarding it to the end user.
Argo (on demand)
>Argo Smart Routing reduces Internet latency on average by 35%; connection errors by 27%
My shop site, as well as my demo sites, are on a modest but powerful Siteground server.
Therefore, I appreciate Argo’s small contribution to my site speed and the fact that it minimizes requests to my server.
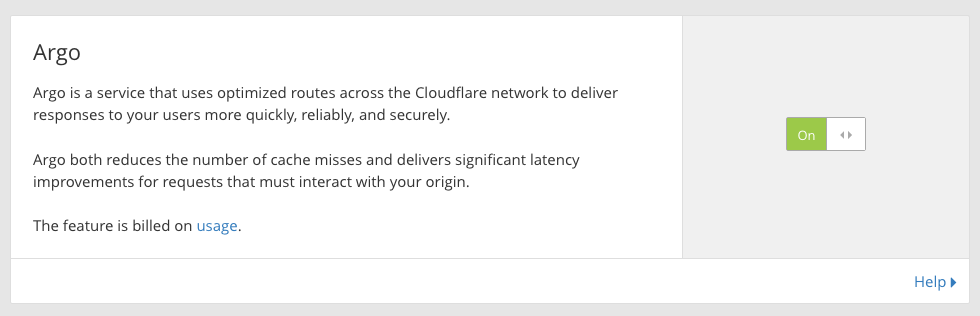
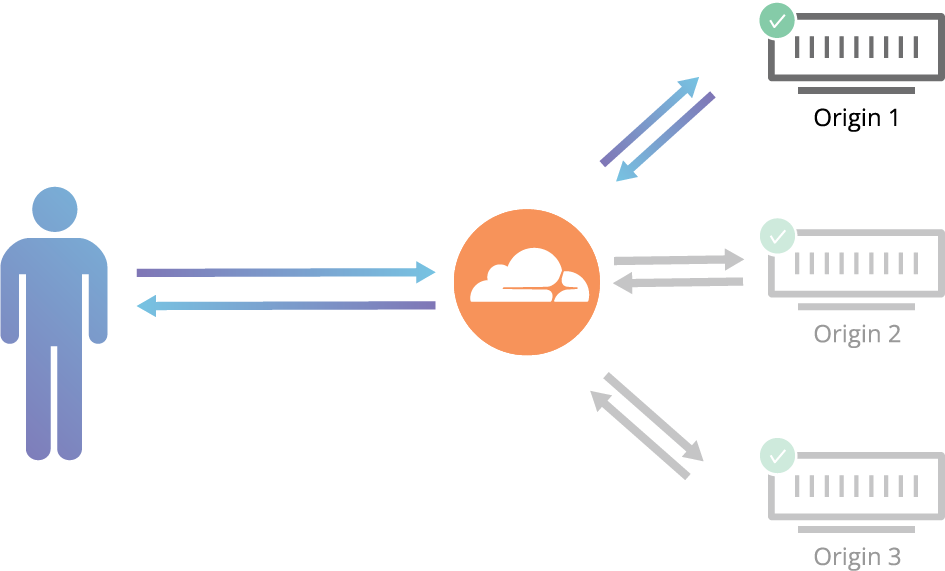
When a request is made, Argo’s smart routing algorithm determines the optimal route through the Cloudflare private network.
If there is traffic congestion in an area, Argo will route the request via a different path.
Argo is an on-demand Cloudflare feature available on any plan. You can read more about the pricing here.
Load balancing (on demand)
The load balancing feature reduces latency by load balancing traffic across multiple servers or by routing traffic to the closest geolocation region.
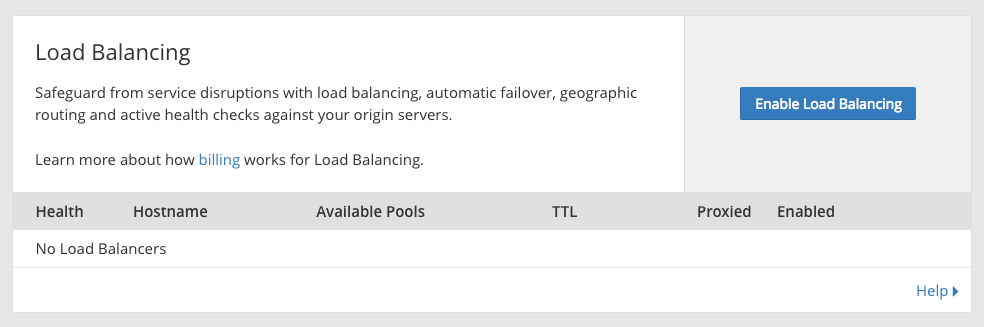
In short, websites need at least one server to work, but for highly demanding sites, you may need several servers.
That’s where a load balancing mechanism is required.
Once activated, Cloudflare’s servers will route traffic to the nearest server.
Load balancing is an on-demand Cloudflare feature available on any plan. You can read more about the pricing here.
Further reading:
Chapter 10: Cloudflare pricing
Let’s make this clear:
Features available on the free plan, such as the CDN, ARE NOT SLOWER than the same feature on the $200 plan.
Some users claim that paid plans receive priority, but I have never found any evidence of this. And from my experience with dozens of Cloudflare sites, I have never noticed any particular slowdown with the free plan.
You do get priority support with paid plans though.
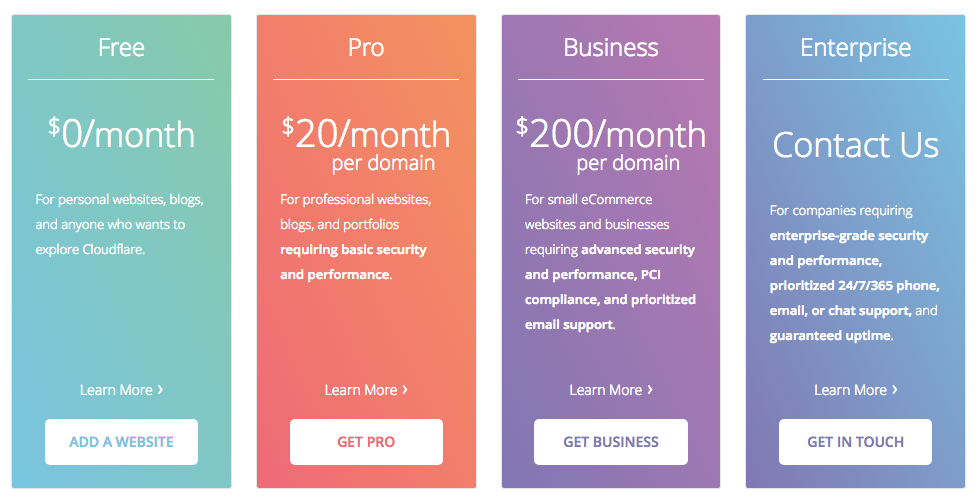
Here are the main (performance-related) differences between each plan.
- 20 page rules
- Polish image optimizations
- Mirage mobile Image optimizations
- 50 page rules
- Polish image optimizations
- Mirage mobile Image optimizations
- Railgun accelerated delivery
- Bypass cache on cookies
- 100 page rules
- All features
Chapter 11: Bonus tips
This chapter introduces special things you can do with Cloudflare.
I’ll update this part every time I find something new.
Don’t hesitate to submit your special config or tip related to Cloudflare and performance.
Cache pages’ HTML with Cloudflare
I was very surprised to learn that Cloudflare can cache HTML pages.
This dramatically reduces the wait and helps display your page instantly.
For your info, I previously made a complete how-to-guide about Cloudflare page caching.
Enable server push
Server Push is a new feature available with HTTP/2.
It lets you send data to the user without waiting for the user to ask for it.
Some resources are always sent to your site’s visitors, no matter what. Logos and stylesheets are good examples.
With this in mind, why not push everything necessary with the initial request?
As you can imagine, this can decrease a page’s rendering time.
HTTP/2 Server Push is exclusively for HTTPS sites
How to activate Cloudflare Server Push
- Install the official WordPress plugin.
- Open your site’s wp-config.php file.
- Add the following code below the line /* That’s all, stop editing! Happy blogging. */
define('CLOUDFLARE_HTTP2_SERVER_PUSH_ACTIVE', true);
Further reading
- How do I enable HTTP/2 Server Push in WordPress
- Google Web fundamentals
- A comprehensive guide To HTTP/2 Server Push
Now it’s your turn
I’m so glad you stayed to the end! I put A LOT of work into this guide. So I hope you enjoyed it.
Did I forget anything? Did you notice a speed improvement?
Let me know in the Comments section below.