
The ABCs of creating a WordPress website
Your compass for creating a WordPress website without losing your sense of direction – 2022 Edition

Would you like to create a WordPress website, but don’t know where to begin? Or have you always been under the impression that it would be much too difficult because you’d have to learn programming and graphic design? Nothing could be further from the truth! I’m going to show you step by step how you can create a complete website, regardless of whether you have internet knowledge or not.
- Required level of expertise: beginner to intermediate
- Time needed to install your website: realistically, I’d say it will take you about 1 to 2 hours to get your WordPress website to the point where you can start adding your content
- What you’ll get: a complete website, a domain name, more money in your pocket, time saved by following a clear, effective tutorial, etc.
A WORD REGARDING TODAY’S LESSON
“I created my first WordPress website in 2006, when I had very little internet experience. Google was my best friend during that time! After 13 years of experience with WP, I launched by own website creation agency, I started the WPCakeWalk blog and taught WordPress in college. Happy reading!”
- Louis-Philippe Dea
TABLE OF CONTENTS
Chapter 1: What’s WordPress and what does it do?
LET’S START WITH THE BASICS: WHAT IS WORDPRESS?
WordPress is a CMS (Content Management System). Eh... what does it mean in english please!? 🤨
More specifically, it’s publishing software that serves as a platform for website creation.
I’ll cover each stage of creating a WP website in depth: from choosing a host to adding content, modifying visual elements, and finally, going live.
IS WORDPRESS A BLOGGING PLATFORM?

I’m often asked if WordPress is a platform specifically designed for blogging.
WordPress was officially launched on May 27, 2003. At that time, it could be said without a doubt that WordPress was dedicated to the creation of blogs. But since then, the WordPress program has evolved spectacularly to become THE world’s most-used content management system for creating websites of every kind imaginable. It’s ideal for:
- Company websites
- Portfolios
- Online magazines and news websites
- Blogs (travel, cooking, personal, etc.)
- eCommerce
- And much more!
In 2019, WordPress was used by 35 percent of all websites across the planet (source). The next most widely used CMSs were Joomla with a 2.8 percent market share and Drupal with 1.7 percent. Based on these figures, it’s clear that WordPress is far from being just a blogging tool. For more information, you can read my article on the differences between WordPress, Joomla and Drupal.
You’re probably aware that there are a number of different online services for creating blogs and websites. You might be tempted to use a free one, but I can tell you from experience that it will cause a lot more problems than you might think. The fact is that you’ll encounter severe short-term and long-term limitations that will become increasingly irritating, slowing your momentum. A website should be like a springboard—not a ball and chain that holds you back and saps your energy.
Contrary to certain beliefs, using a paid service is far from expensive (we’re looking at an investment of around €85/CAN $125). Remember that the tool you use will be the foundation of your project. If you build on a solid foundation, your project will have much better chances of success!
But be careful! With WordPress, you have two options, and people often confuse them. So here’s the difference:
- WordPress hosted on WordPress.com servers: a product that’s very limited in several aspects, including visuals and features. It’s also a rather expensive service to get those features we’re interested in.
- 👉 WordPress hosted on your own server: this is the option I recommend without hesitation. In this case, WordPress is totally free. The cost of your website will just be the cost of hosting your files. The advantages include a more reasonable price and no limitations to the platform.
I’ll show you exactly how to use this second option to avoid constraints in the creation of your blog or website, as well as short-, medium- and long-term annoyances, so you end up with a professional website while saving time, money and effort.
WHAT IS A BLOG AND WHAT IS ITS PURPOSE?

A blog is intended to share information, resources or opinions with regard to a certain topic or passion. It can be a website or part of a website. There are several reasons why you might want to embark on this great adventure:
- To increase your company’s visibility. Whether you’re a freelancer, an SME or a large company, adding a blog to your website is a low-cost way of becoming more visible. It will help your business obtain high-quality leads.
- To earn money working at home. Part of my income is generated by WPCakeWalk. In 2019, tens or even hundreds of thousands of people decided to earn their primary income or supplemental income by blogging. 💪But be careful not to delude yourself. Making money with a blog is a lot of work. However, it’s feasible for many people, and your financial risks are minimal (€85/CAN $125).
- To write and share. If you simply want to share your travel experiences, tell your stories, encourage other people, review restaurants or build a community around a specific topic, creating a blog is an excellent way to grab the mic.
Chapter 2: Choosing the domain name for your website
A domain name is an internet address. For example, www.wppourlesnuls.com is my domain name. Choosing a good domain name is an art in and of itself. It might happen quickly or it might require a long period of reflection, considering that it is often intimately associated with:
- Your company name, project name or branding
- The type of service you offer (for example, www.veganrecipes.com)
Here are some tips and tidbits you should know regarding domain names:

- Unless you already have a hosting plan, don’t purchase a domain name from GoDaddy or any other domain registrar. The reason is that, in the next part of this tutorial, we’ll talk about web hosting and how the majority of hosting companies offer you a free domain name when you purchase your hosting plan.
- I always recommend opting for a .com extension if available. The .com extensions are the most well-known and most commonly used ones.
- If a .com extension isn’t available, consider using a .us (if you’re in the United States), .uk (in England), .ca (in Canada), .org (for organizations), .edu (for schools and universities) or .net extension.
- Make sure that your domain name is easy to spell and pronounce.
- If possible, keep your domain name short and simple.
- Avoid using dashes, numbers and other types of special characters.
- Be memorable.
For more advice on this topic, read my article on 11 Rules for Choosing the Perfect Domain Name for Your Needs.
Chapter 3: Finding a WordPress hosting company
THE BASICS: WHAT IS WEB HOSTING AND WHAT IS ITS PURPOSE?
Web hosting is used to store the files that are necessary for displaying a website. For example, your hosting company serves as a bridge between your WordPress files and your domain name so that users can visit your website. When people type www.yourwebsite.com into their browsers, the domain name will be linked to your web server to display your website.
HOW TO CHOOSE A HOSTING SERVICE WHEN THERE ARE TONS OF COMPANIES!
I’ve put together a comprehensive guide comparing the WordPress hosting services that are the most popular and most frequently used within the WordPress community. It will help you pinpoint your needs and compare the relative advantages and disadvantages of each one so you can make an informed choice. Here’s a table summarizing some of the key points.
OVERVIEW OF WORDPRESS HOSTING SERVICES
Best value for the money
Best price
Site with a lot of visitors
Step 4: Installing WordPress on a web server
The process for installing WordPress varies from one hosting company to another. In general, it’s fairly simple, but it still requires several specific maneuvers. Here’s the detailed procedure for purchasing your plan and installing WordPress for each companies.
INSTALLING WORDPRESS WITH BLUEHOST
![]()
BlueHost has created an exclusive WPCakeWalk offer for only $3.95 per month. Yeah! 💰
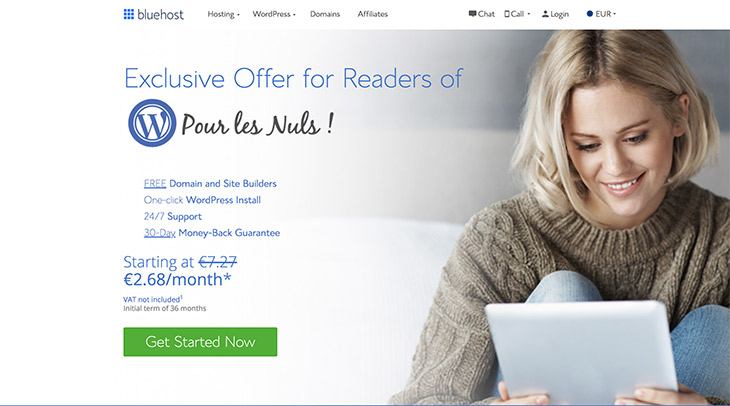
Once the page is open, click on the green Get Started Now button..
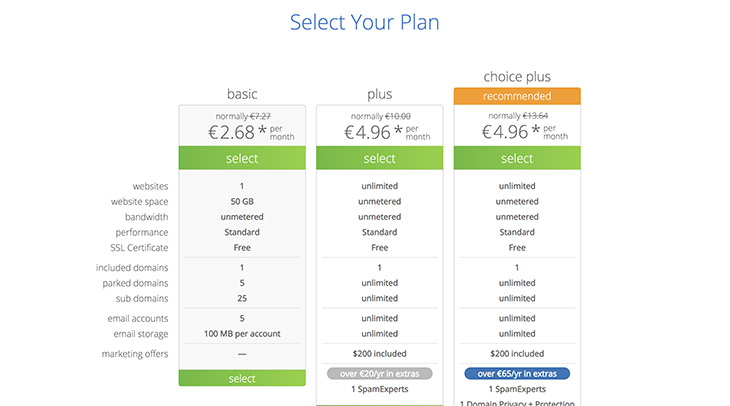
Choose the plan you’d like to use to start your project. I generally recommend either the Basic or Plus plan to start a new website. If your needs evolve over time, you can always switch from one plan to another. Click on the green Select button to proceed to the next step.
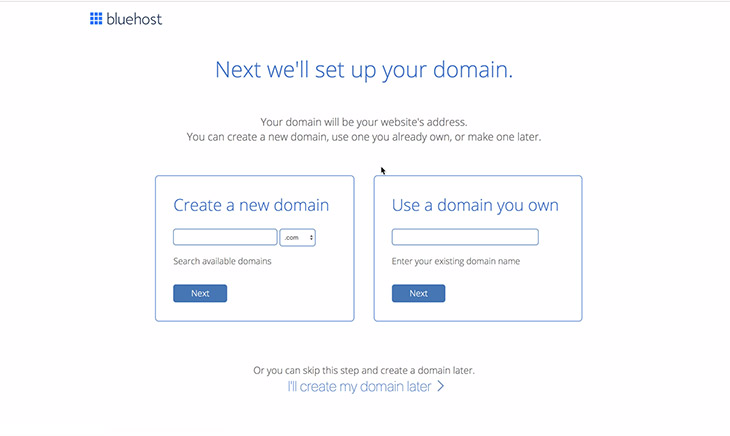
At this point, you’ll choose your free domain name. If you already have one, enter it in the section on the right. Later, you’ll have to associate the BlueHost DNS addresses (ns1.bluehost.com, ns2.bluehost.com) with your domain name through your domain registrar (for example, GoDaddy, if that’s where you purchased it). Click here to learn the exact procedure for linking your domain name to your BlueHost hosting service.
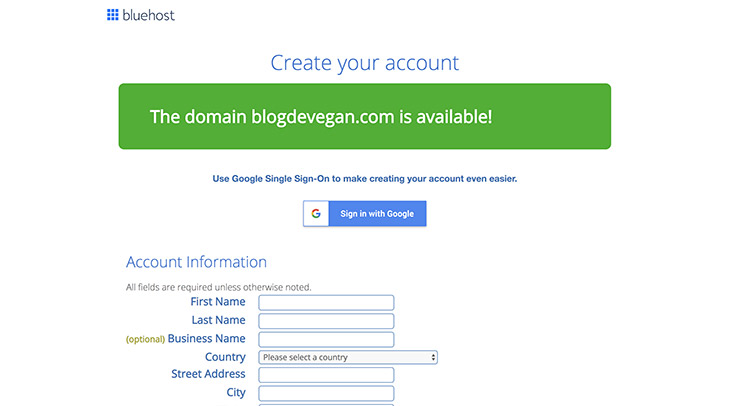
Last, you’ll enter your credit card information and proceed to checkout. Click on the check box next to “I confirm I have read and agree to the terms…” and complete your order by clicking on Submit.
You’ll be redirected to an account creation confirmation page.

Click on Create Account and set the password you’d like to use for your BlueHost account.
INSTALLING WORDPRESS IN YOUR BLUEHOST ACCOUNT
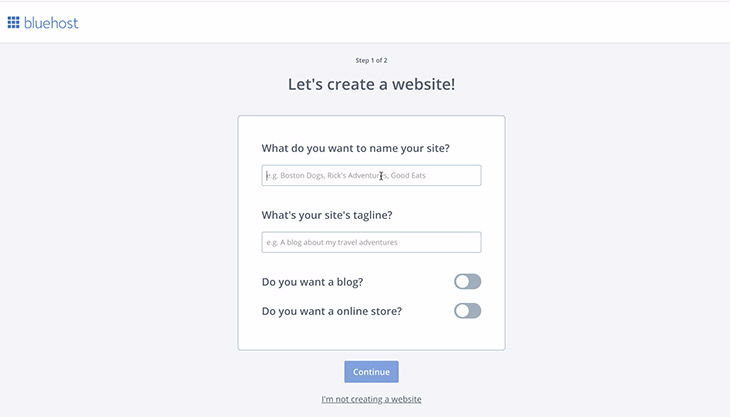
Enter the name of your website and a short description. Click on Continue.
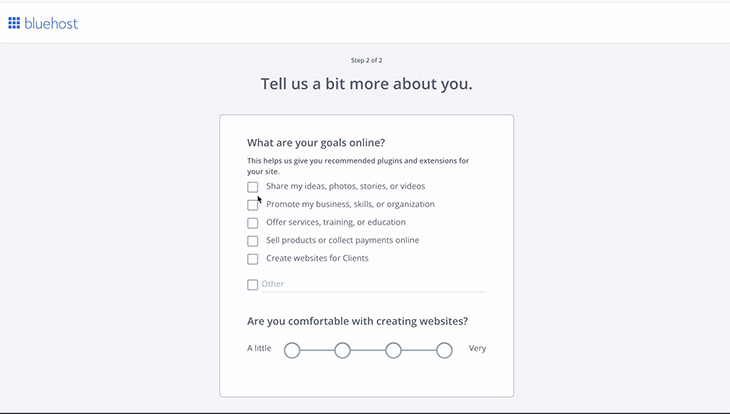
Check the appropriate boxes for your internet project.
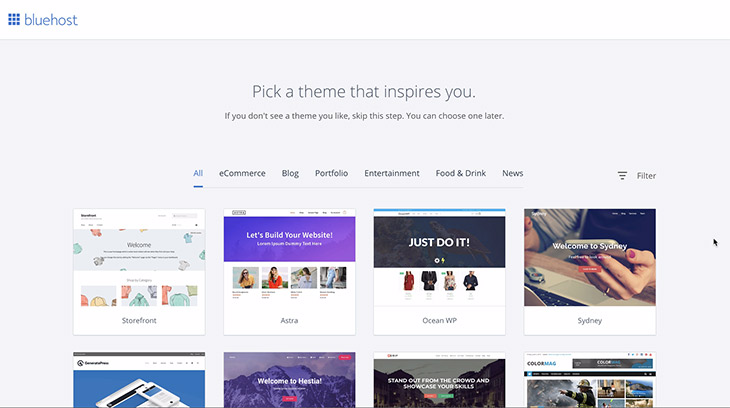
You can then choose a free WordPress theme provided by BlueHost. This is an optional step, and as I mentioned in the video, I don’t recommend using free themes for the creation of professional websites. .
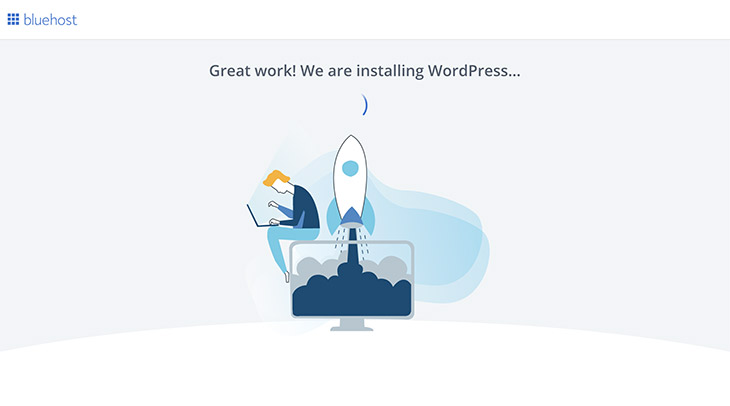
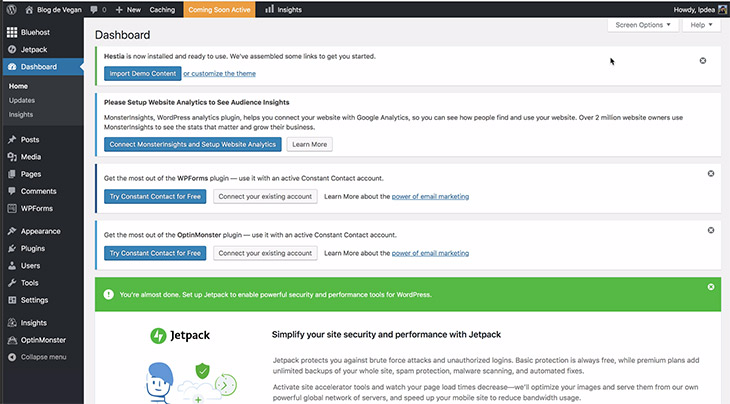
That’s it! You’re done! WordPress is now installed on your BlueHost server.
You can log on to your WordPress content management dashboard and start creating your website.
INSTALLING WORDPRESS WITH SITEGROUND
OPENING YOUR SITEGROUND HOSTING ACCOUNT
To begin the registration process, visit the SiteGround website.
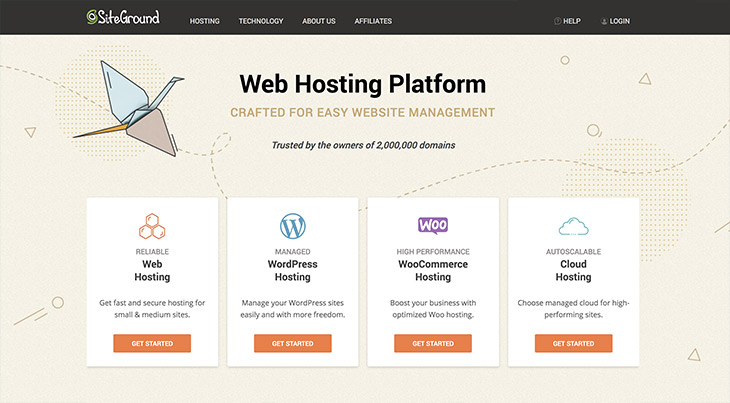
Once you’re on the website, click on the green Get Started button under the WordPress logo since you’ll want to get hosting service specially designed for WordPress in order to add your website or blog.
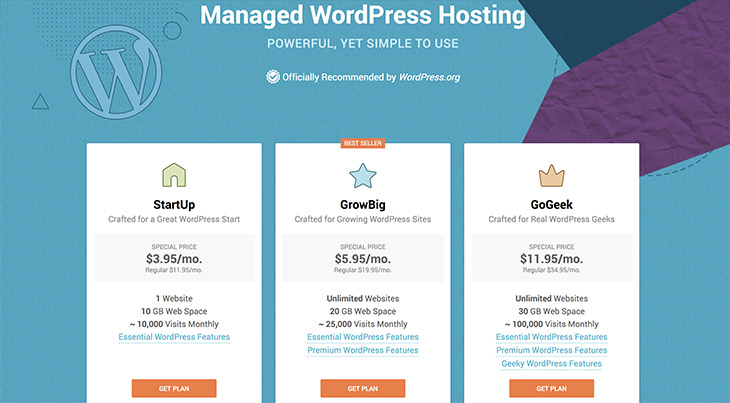
Choose the plan that’s best for your needs. In most cases, you’ll want to choose the StartUp plan since you’ll need a server for just one single website. If you need to add multiple websites, choose the GrowBig plan. Keep in mind that you can always upgrade your plan later if necessary..
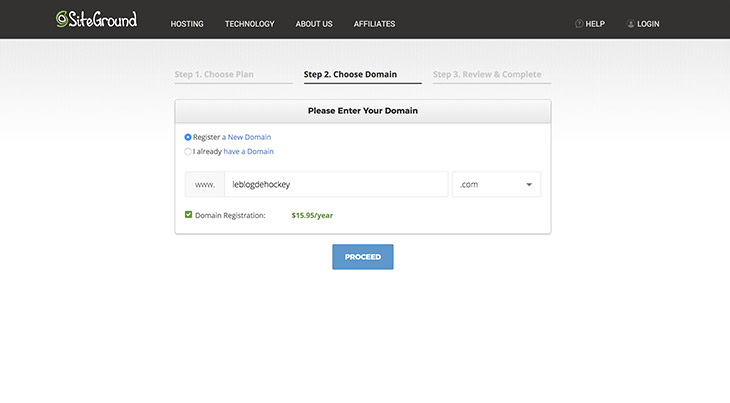
Next, select the option that corresponds to your situation:
- I don’t have a domain name and would like to get one free (or I already have one but would like to get another one free)
- OR I already have a domain name and would like to use it for my website on SiteGround
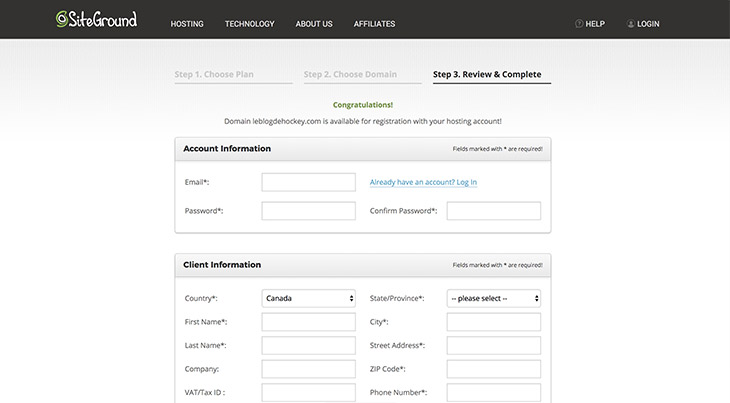
Enter your account information, client information and payment information to place your order..
The following screen will appear indicating that your account has been created successfully.
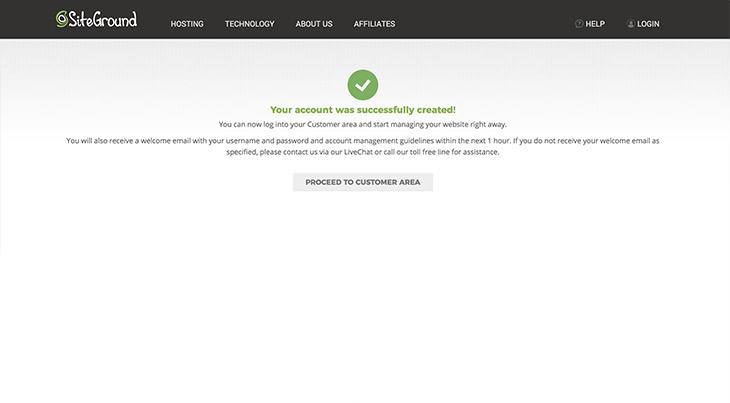
Click on Proceed to Customer Area..
INSTALLING WORDPRESS WITH SITEGROUND
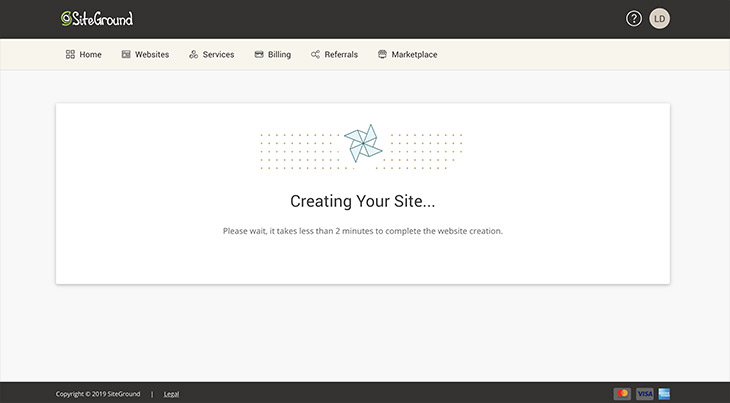
You’ll be redirected to the panel where you’ll begin installing your website on your web hosting service. Click on Set up Site.
The first step will be performed automatically if you chose a new domain name when you purchased your plan. Otherwise, you’ll be prompted to enter your existing domain name (click here to learn the procedure for linking an existing domain name to your SiteGround hosting service).
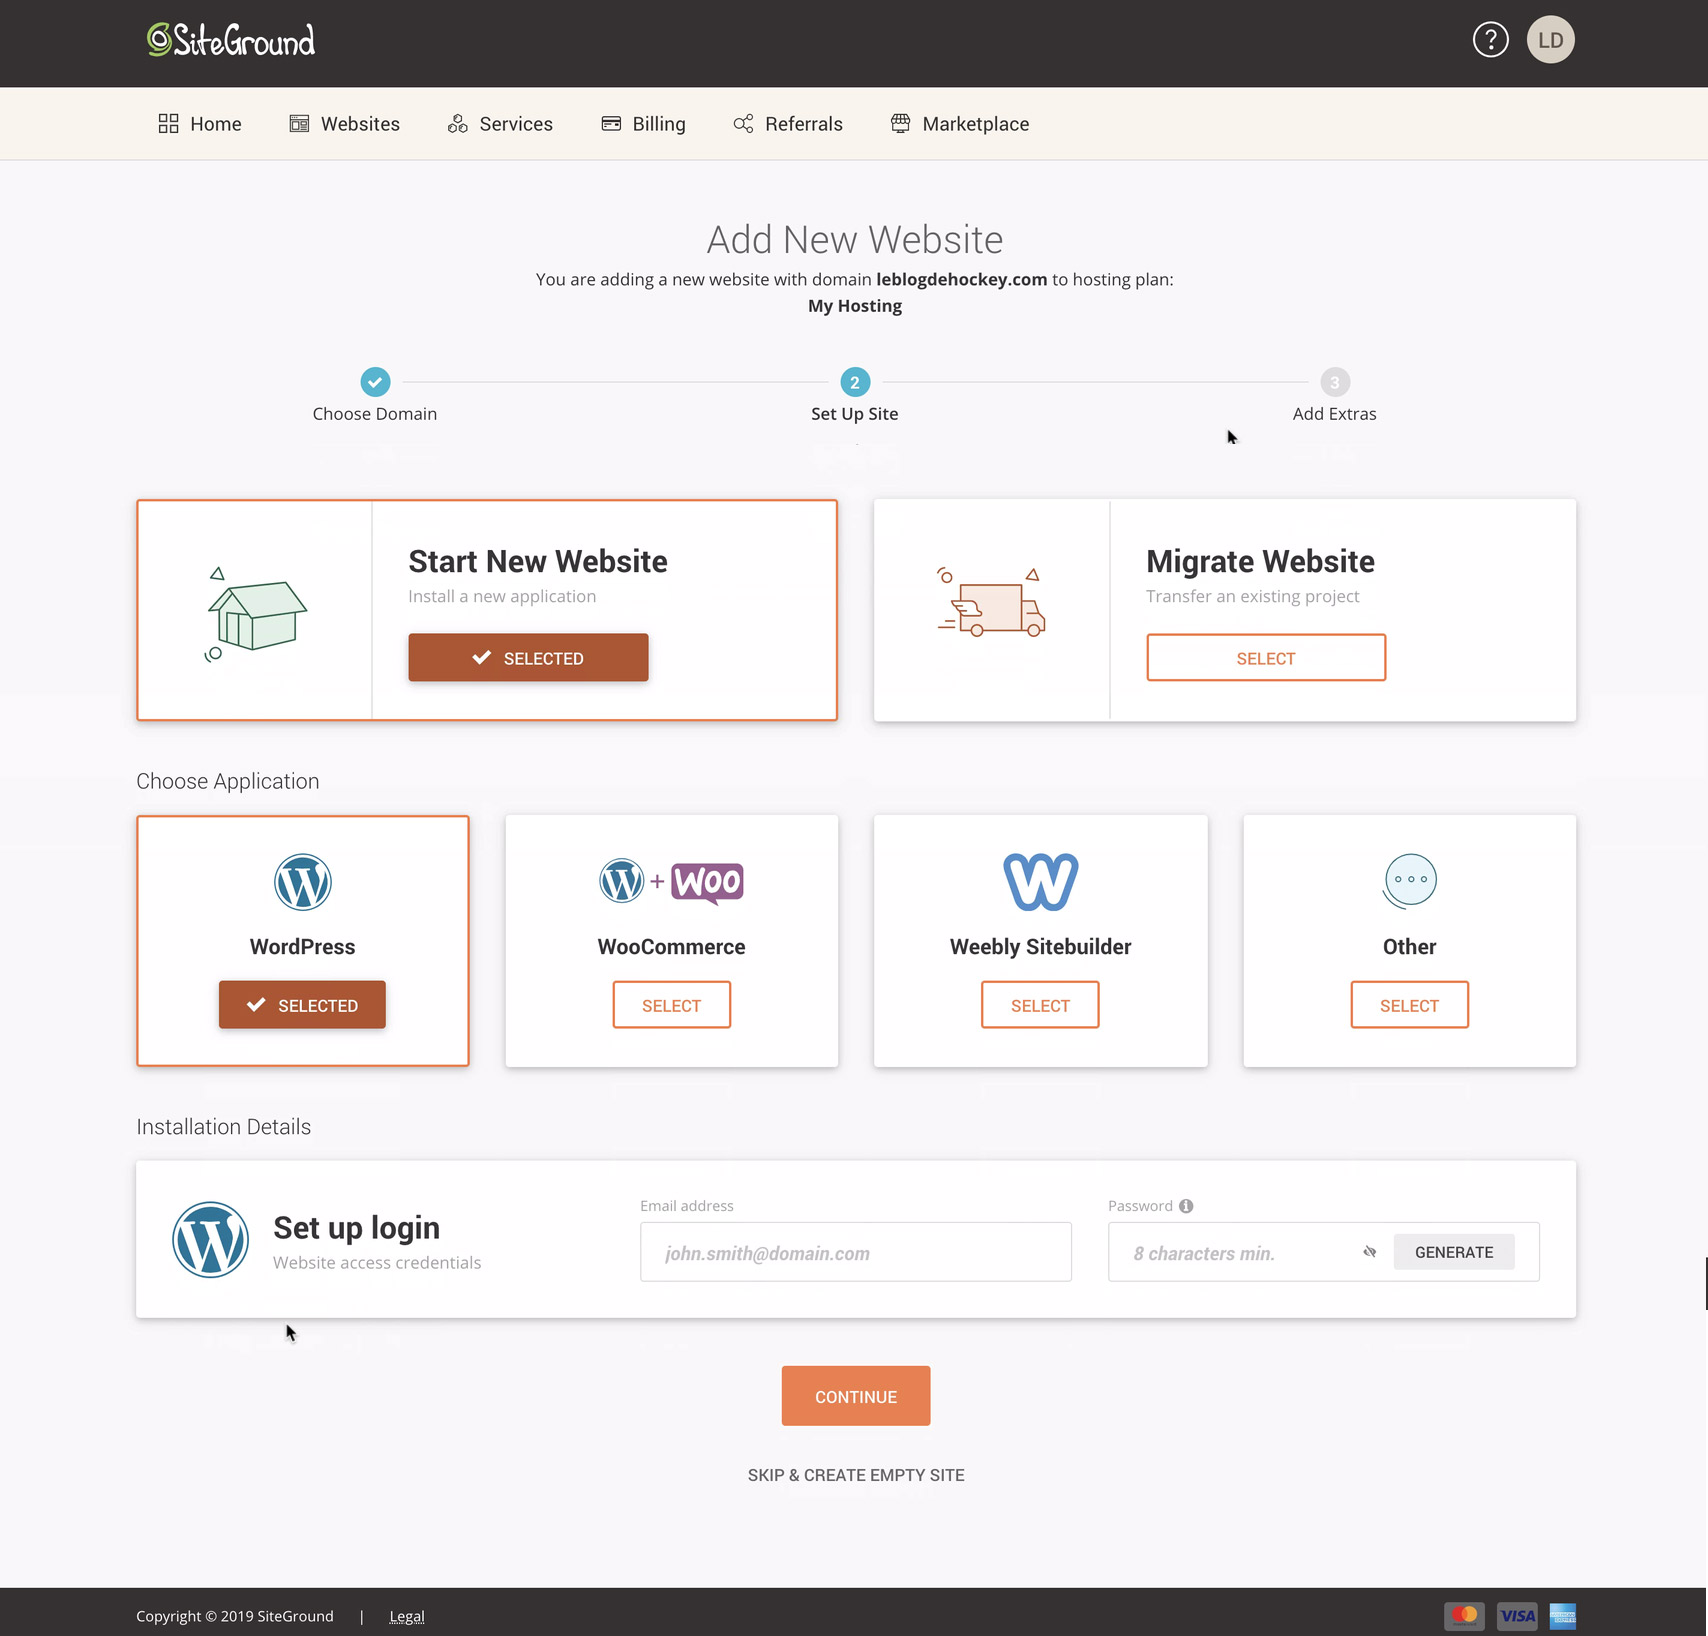
You’ll be asked to choose between two options: Start New Website or Migrate Website. Choose the first option if this is a new website and choose the second option if you already have a WordPress website that you’d like to migrate to SiteGround.
Choose the WordPress option or the WordPress + WooCommerce option (if you want to install a WooCommerce online store).
Add the information you’ll use to log on to your WordPress content management dashboard. Be sure to keep this information in a secure place.
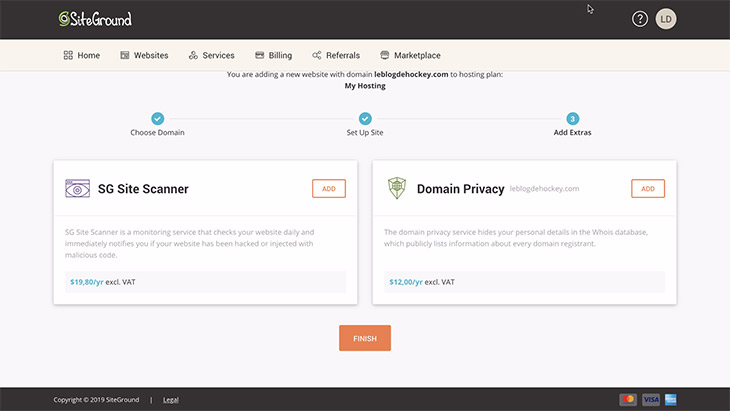
You’ll then be asked if you want to add various options to your plan. Personally, I would say no to the SG Site Scanner option. Depending on your preferences, you might want to choose the Domain Privacy option, which will protect the personal information associated with your domain name. This might be a good way to avoid useless spam. Click on Finish.
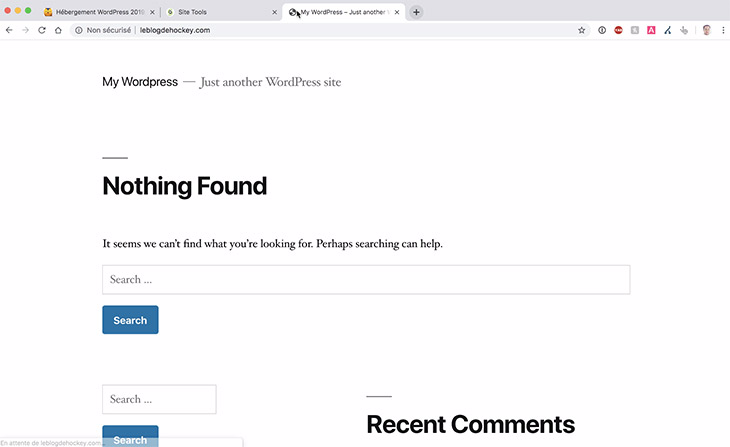
To make sure that WordPress has been properly installed, type your domain name in the address bar of your preferred browser. You should see something like this:
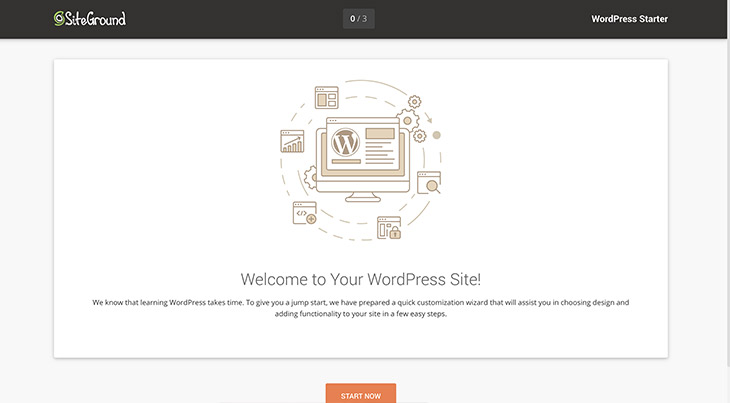
Open a new tab in your browser, type your domain name and add /wp-admin/ at the end, like this: http://www.mywebsite.com/wp-admin/. Enter the login information you created a few steps back. Click on Start Now.
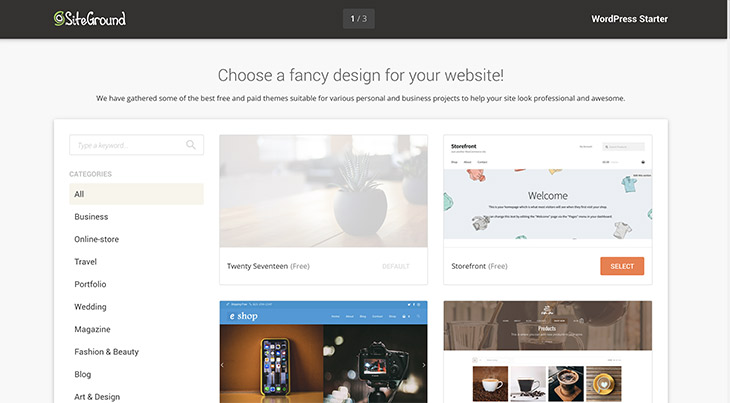
You will then be prompted to choose a free WordPress theme for your website. FYI, there’s already one installed on your website. As I mentioned in the video, I don’t recommend opting for a free theme for your website, as they are limited in terms of personalization, visuals and features. In my opinion, any serious website project warrants a professional WordPress theme. Scroll to the bottom of the page and click on Continue.
The two final steps consist of choosing your plugins. Personally, the only option I’d select would be Optimize for SEO because it will install the Yoast SEO extension—the only one listed that interests me. As for the rest of the features, I prefer other alternatives to the ones suggested by SiteGround. For example, I prefer Gravity Forms to WP Forms for creating things like contact forms.
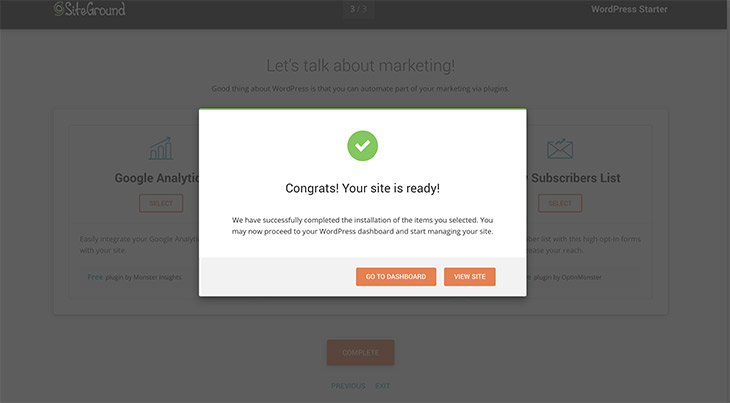
Your WordPress website is now installed on your SiteGround server! Congratulations!
Step 5: Choosing a theme, installing it and importing a demo
A PAID (PREMIUM) THEME OR A FREE THEME?
With regard to themes, you have two options: a free theme or a premium theme. For me, there’s no question about it. After having created several hundred WordPress websites, I can tell you that, in the vast majority of cases, choosing a free theme means wasting time, effort and money. Especially if you aren’t a programmer. Any project that’s the least bit serious should use a premium theme.
HOW TO CHOOSE THE BEST WORDPRESS THEME FOR YOUR PROJECT
First of all, you have to determine your needs and the type of website you’re building. Is it a portfolio website, a company website, an online magazine, a blog, an online shop (eCommerce) or something else? Here are a few links to lists of specialized themes for different categories:
- 📬 30 themes for blogs
- 🗞 25+ WordPress themes for magazines and news websites
- 🚀 30 themes for travel websites
- 🥗 20 themes for cooking and recipe websites
- 📸 40 WordPress themes for photographers
- 🖥 Ultimate guide to WordPress themes
You can also visit websites where they sell the most popular premium themes:
WHAT TO CONSIDER WHEN SHOPPING FOR A THEME
Here are the aspects I take into account when shopping for a specific theme for myself or one of my clients:
- Visuals that correspond to the look I want to give to my project
- Clean visual styles with an up-to-date look
- Features that will meet the needs of my website (for example, a tool for making appointments online)
- A significant number of downloads and favorable ratings and comments from others who have used the theme, as these are good indicators of its quality
- Compatibility with the most popular plugins (WooCommerce for eCommerce, WPML for multilingual sites, Elementor or Visual Composer as a site builder, Gravity Forms for contact forms, etc.)
Personally, I don’t really look at the price (I’d rather pay $60 to $70 for a theme that’s complete, reliable and substantial than $25 for a theme with fewer features and possibilities)
INSTALL A WORDPRESS THEME
There are two different ways to install a WordPress theme:
- From your content management dashboard: click on Appearance -> Themes and then click on the Add button at the top of the window. Next, select the ZIP file containing the folder with your theme.
- Via FTP: log on to your web hosting service using FTP software like FileZilla. Add the folder with your theme from the directory wp-content -> themes. Next, activate it through your WordPress content management dashboard under Appearance -> Themes.
Please note: when you download a premium theme from ThemeForest, Elegant Themes or any other website, you will receive a ZIP file containing several folders related to your theme, including, among others, the source files and license files. Make sure not to upload the ZIP file, itself. You must first unzip it on your computer and then extract the specific folder containing only the theme files.
IMPORTING A DEMO
Each premium theme has its own unique method for importing website demos. Here's a couple of videos for particular WordPress themes including Divi, Avada and Bridge.
Chapter 6: Performing basic WordPress configurations
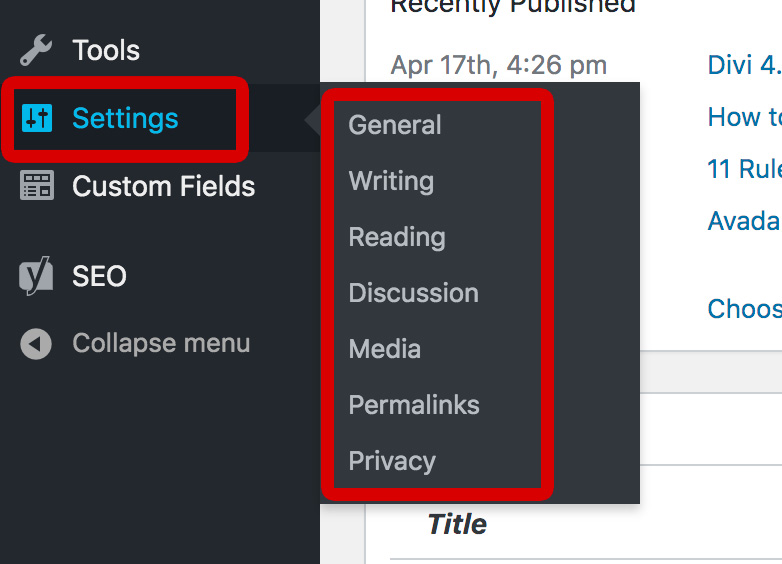
To perform the basic configurations of your WordPress website, you’ll use the Settings menu, as well as the General, Writing, Reading, Discussion, Media and Permalinks submenus.
GENERAL SETTINGS
Here’s a list of the settings that I find useful to modify:
- E-mail Address: this is the address you want WordPress notifications sent to (for example, when an automatic update has been performed).
- Membership: this option gives anyone the ability to register an account on your WordPress website (I deselect this option for the vast majority of my sites).
- New User Default Role: in relation to the previous option, this refers to the default permissions you want to assign to those who register accounts on your website.
- Site Language: this is the default language to be used for your content management dashboard and your website.
- Timezone: choose the appropriate time zone for your location so that your entries will be posted at the correct time.
WRITING SETTINGS
The only setting I find useful to modify here is Default Post Category to select the category assigned to a post when you create a draft or post without assigning another category to it. Please note that you must create new categories before you can select one from the drop-down menu.
READING SETTINGS
- Front page displays: this is a frequently used option that enables you to determine which theme page or file will be the default main page of your blog. If you select “Your latest posts,” your website will use the file index.php from your active theme. The option “A static page (select below)” allows you to define a front page for your blog and a personalized page for your posts, based on a page created through the Pages menu.
- Blog pages show at most: this setting establishes the maximum number of posts that will be displayed per page in your blog.
- Syndication feeds show the most recent: this is the number of posts that will be displayed in your RSS feed.
- For each article in a feed, show: this option lets you determine whether your RSS feed includes the full version of your posts or just a summary.
- Search Engine Visibility: this is an important option for indexing. It should be deselected if you want search engines to be able to see and index your website.
DISCUSSION SETTINGS
All of the options on this list are pretty straightforward. If you have any questions, please don’t hesitate to ask them in the comment section at the end of this article.
MEDIA SETTINGS
You can specify the maximum dimensions for each image size (thumbnail, medium and large). Bear in mind that premium themes generally crop these images automatically.
PERMALINKS
- Day and name or Month and name: these options are used if you have a magazine-style website or an online journal in which dozens of articles are posted each day.
- Post name: this is the most frequently used option, as it is the most user friendly for search engines, social media and your readers.
Chapter 7: Personalizing a WordPress website (logos, navigation, footers and sidebars)
ADDING A LOGO IN WORDPRESS
Although every WordPress theme is programmed differently, the method for adding a personalized logo is similar from one theme to another. Check out the video below for a tutorial on how to do it
- Most premium themes have their own personalization menu for modifying the visual style of the website header and modifying the logo at the same time (see the video above).
- In the case of certain free themes, this modification is performed through the Appearance -> Personalize panel. There, you will find a Site Identity menu, which should include an option to add your own logo.
MODIFYING THE MENU STRUCTURE OF YOUR WEBSITE
When you use a professional theme, configuring the way users will navigate your WordPress website is generally done in two phases.
During the first phase, you will choose the desired visual style of your website. This feature is frequently available in the section where you modify your theme preferences, under the Menu or Header tab.
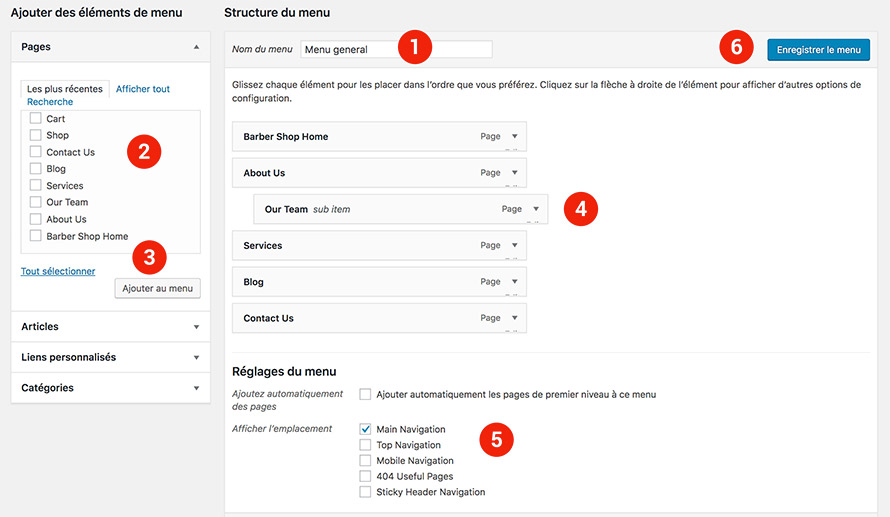
During the second phase, once you’ve chosen the style for your menu, you will create it in your WordPress dashboard under Appearance -> Menu. See the image below for the location where you will perform each of these steps:
- Create a new menu by giving it a custom name.
- Select the pages and page types you want to add to it.
- Click on Add to menu.
- Establish the order of your links according to your preferences. You can even create sub-menus.
- Select the location where you want the links to appear (certain themes offer different placement options, such as main navigation, top navigation, footer, etc.
- Save your changes by clicking on Save Menu.
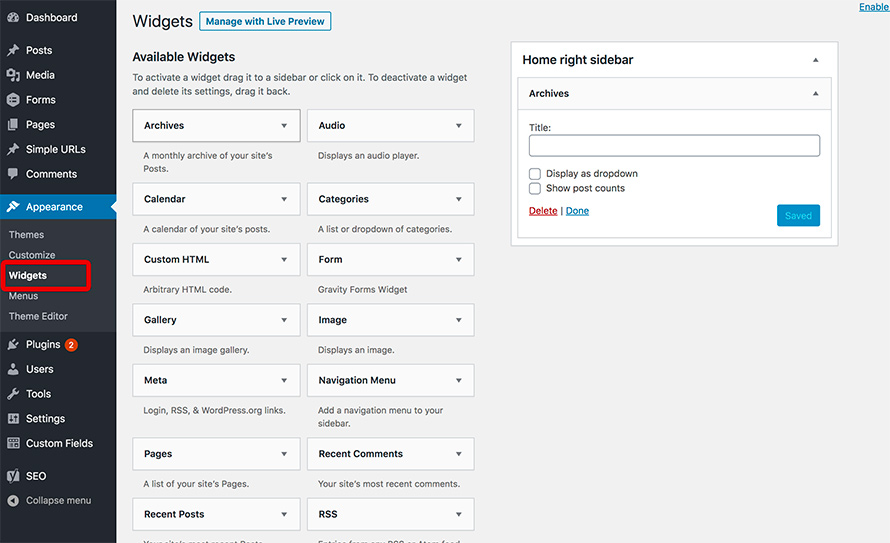
MODIFYING THE FOOTER
The ease of adding and personalizing the footer on a WordPress website depends, once again, on the programmer or programmers who built the theme you’re using. In most cases, you will add content to the footer in the Appearance -> Widgets menu. What is a widget and what is its purpose? A widget is a block assigned to a precise area of your WordPress website. You can introduce different types of content in it.
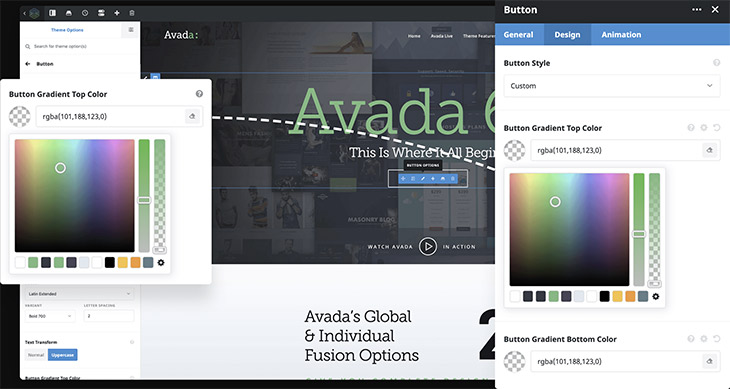
Most WordPress themes use widgets to control the footer content. For example, in the Avada theme, you have three widget blocks assigned to the footer: Footer Widget 1, Footer Widget 2 and Footer Widget 3.
Themes also offer you a certain amount of control over the visual aspects of your footer. Browse the theme personalization menu and look for the Footer section. You should at least be able to choose the number of columns of content to display and perhaps also modify the colors and typeface.
ADDING A SIDEBAR
The process for adding a sidebar to your WordPress website is similar to the process for adding the footer. The content is controlled through the widget module, Appearance -> Widgets. In the personalization menu of your active theme, you will find a section devoted to modifying the visuals of the sidebar.
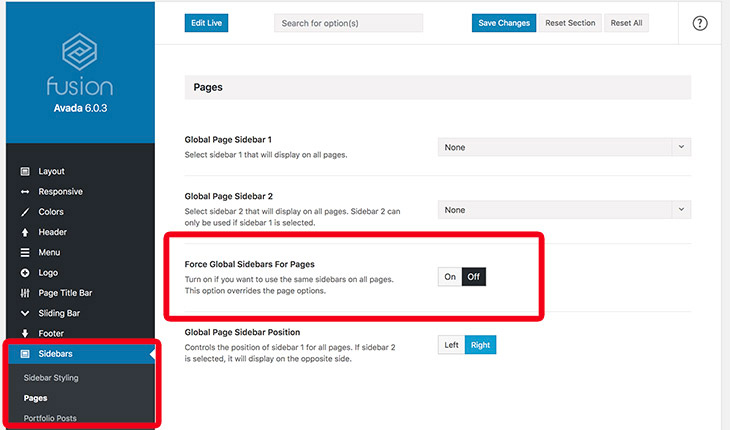
It isn’t unusual to want to display or hide a sidebar depending on the various pages or page types within the website. For example, it might be useful to have a content area that takes up the full length of the frame of the website rather than separating this area into two or three parts with the addition of one or two sidebars.
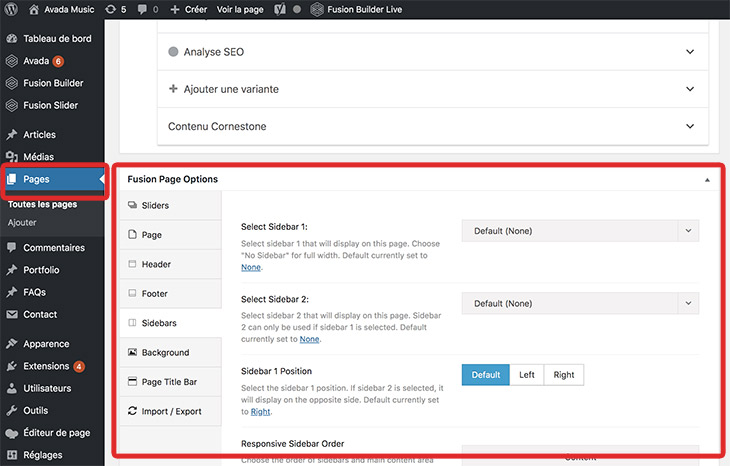
The place where you control this feature will vary from one theme to another. In some themes, you can display or hide the sidebar through the theme personalization menu (see the first image below). You might also be given this option for individual pages (or individual posts) through a specific module in the page or post (see the second image below).
Step 8: Creating pages and adding content
It’s easy to add new pages in WordPress. However, adding content and setting the desired page layout is a different story. Considering that every WordPress theme is designed and programmed differently, there are numerous methods for creating pages that are visually attractive and professional. I explain a few of them in this video. For further information, I recommend that you continue reading below the video.
Regardless of which theme you have, the default WordPress text editor is always there and can be used from one website to the next. Several versions ago, we began seeing the new WordPress content editing tool, Gutenberg. Personally, I don’t like it at all and I don’t know many other people who do, either. I find its features to be very limited, and this prevents me from obtaining precise results in terms of the page visuals. I often install the Disable Gutenberg plugin. This allows me to revert to the previous WordPress text editing tool, which I find much easier to use.
In fact, I exclusively use the old native WordPress content editing tool for creating blog posts, as the page layouts are generally pretty basic. If I need to create a content page that’s visually more appealing, I normally use a more advanced content editing tool (see the next section below).
PAGE BUILDER AND SITE BUILDER CONTENT EDITING TOOLS
There are numerous professional extensions for more complex page layouts. They come free with the purchase of a premium theme or can be purchased separately if your current theme doesn’t include a tool of this type. You should be aware that, before you truly feel at ease using any of the site builder tools listed below, there will be a certain learning curve. Luckily, there are numerous videos available on YouTube to help you keep learning! And it’s well worth the effort! Here are the most popular page builders:
Divi by ElegantThemes
Elegant Themes is a company that designs premium themes. Their most popular and most powerful theme is called Divi. Divi is, in fact, a theme that uses a powerful page builder. You can try it out by modifying elements of a real webpage in real time.
MORE INFO ON DIVI TRY THE DEMO
WP Bakery (Visual Composer)
The WP Bakery plugin (also called “Visual Composer”) is a super-powerful extension that lets you create all sorts of page layouts and add a very wide variety of different types of content. This tool gives you control over the arrangement of your elements and the corresponding visuals.
MORE INFO ABOUT WP BAKERY TRY THE DEMO
Fusion Builder - Avada
Avada is the best-selling WordPress theme of all time. The team of web developers who programed the theme chose to create their own content editing tool, called “Fusion Builder.” It allows you to create all kinds of page layouts and add a wide variety of content of many different types.
Other page builders: Elementor, Beaver Builder, etc.

There’s a whole host of other page builder plugins that are very powerful and very popular in the WordPress community. It’s worth mentioning that Elementor and Beaver Builder are the two most popular extensions among web developers and programmers.
Step 9: Adding and creating blogs
Here, it isn’t necessarily a matter of how to create a blog but rather how to add a blog to an existing WordPress installation. When opening a blog, there are always two possible scenarios:
- The blog will be the website. In this case, the blog will be the homepage and the heart of the website (for example, this WPCakeWalk website).
- The blog will be a part of the website. This implies that the blog will be installed in a specific section of a new or existing website (for example, www.mywebsite.com/blog/)
In the video below, I explain exactly how to add a blog in each of these scenarios. I also give an overview of how to enter your content in the pages of a blog post. You’ll notice that the video begins with the preliminary steps we already covered in Chapters 2, 3, 4 and 5 of this article, i.e. the domain name, hosting, installing WordPress and installing themes.
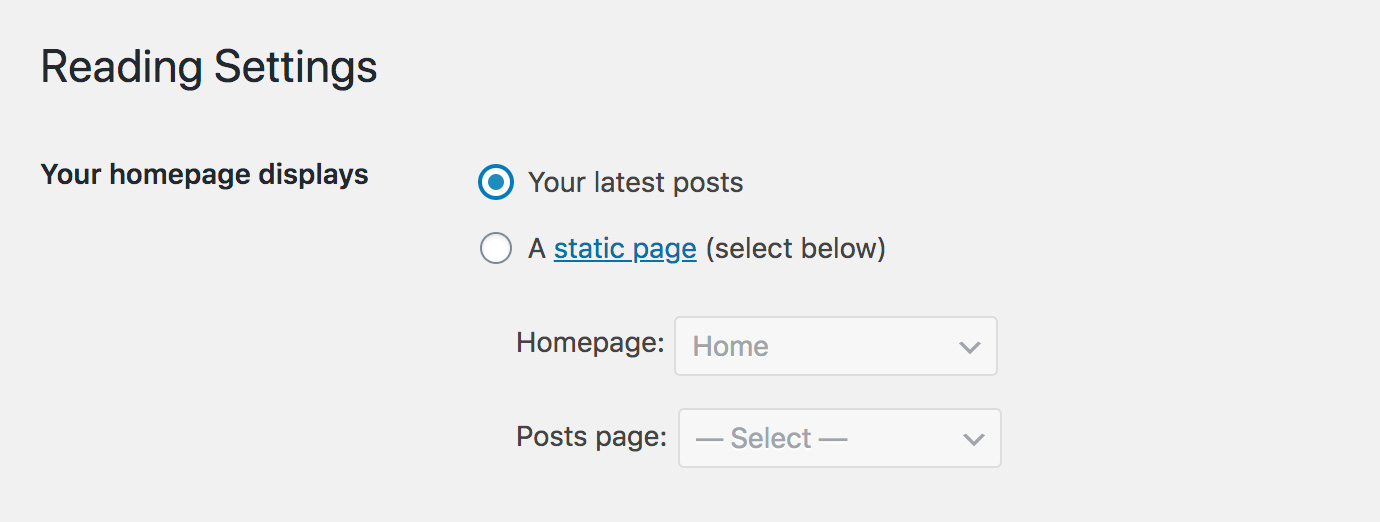
TURNING A WORDPRESS WEBSITE INTO A BLOG (FROM THE HOMEPAGE)
From your content management dashboard, click on Settings -> Reading. The first parameter you can modify here is Front page displays… By selecting the option “Your latest posts,” you’re specifying that your homepage will show the most recent blog posts, which would become, in theory, the main page of your blog.
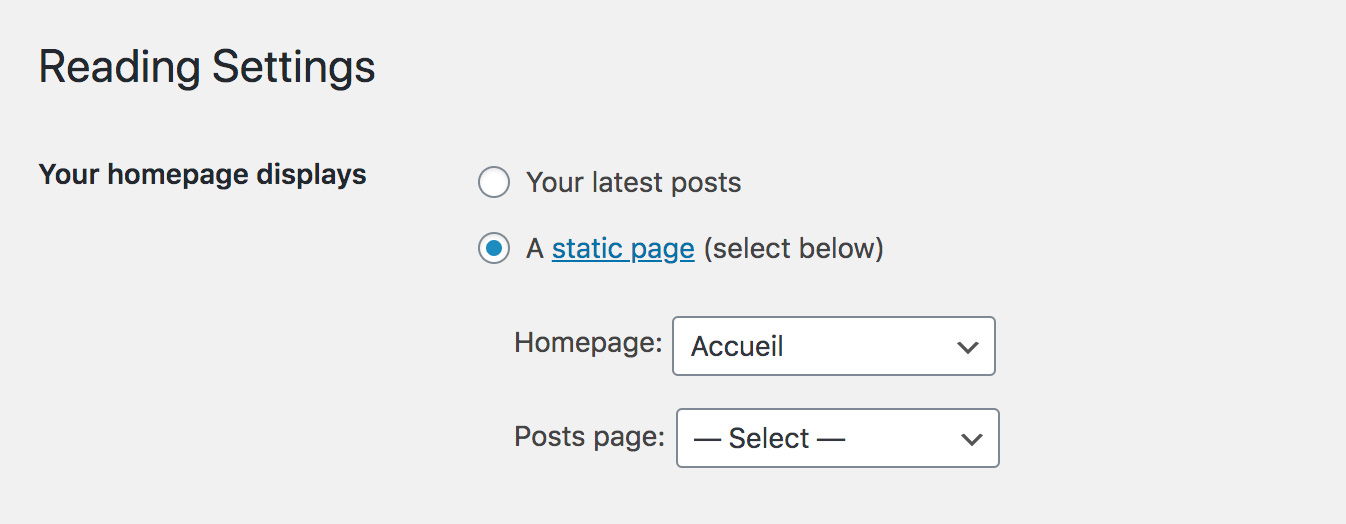
ADDING A BLOG TO A SPECIFIC SECTION OF A WORDPRESS WEBSITE
As before, you’ll start by clicking on Settings -> Reading, but this time, you’ll select the option “A static page” next to Front page displays… You’ll be able to choose a specific page to use as the homepage of your website and a specific page on which to display your blog. The pages shown in the drop-down menu will be the ones you previously created in the Pages module.
Please note that, by assigning a static page for your blog, the page won’t use the page.php file from the active theme but, instead, your index.php page.